My previous article focused on using programming as an example of applying math one already knows to a different context. The purpose of this article is to describe how one could, through programming, learn a new mathematical concept.
What I will do is use some examples to show one could start with an exploration using Turtle Art (which is a programming environment designed for kids) and use this exploration to end up developing models of how a few areas of mathematics work. You can download the examples here and open them up in Turtle Art to explore them yourself.
In Turtle Art, programming is done through the use of snappable blocks, each of which represents a different programming structure. It is very similar to the Scratch programming environment, both of which are based off of the Logo programming language. Any decent exploration of Turtle Art should start with attempting to snap different blocks together and see what they do.
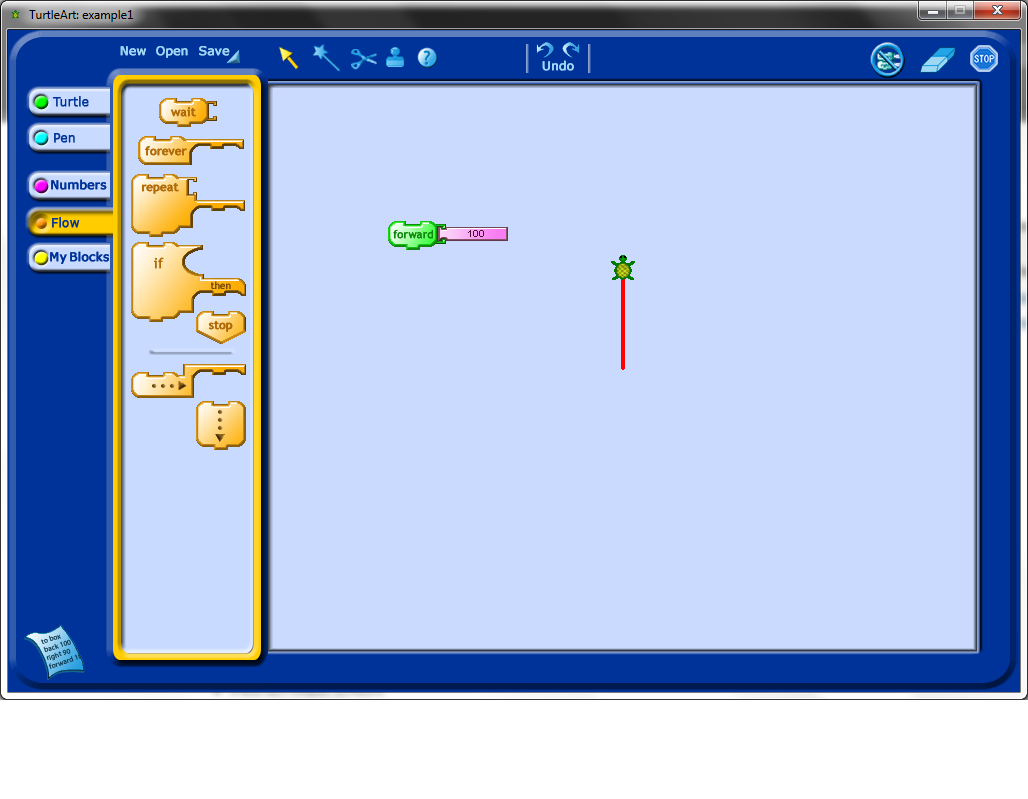
You could show students how to use one of the simplest blocks, the forward block. The output of this block is shown below.
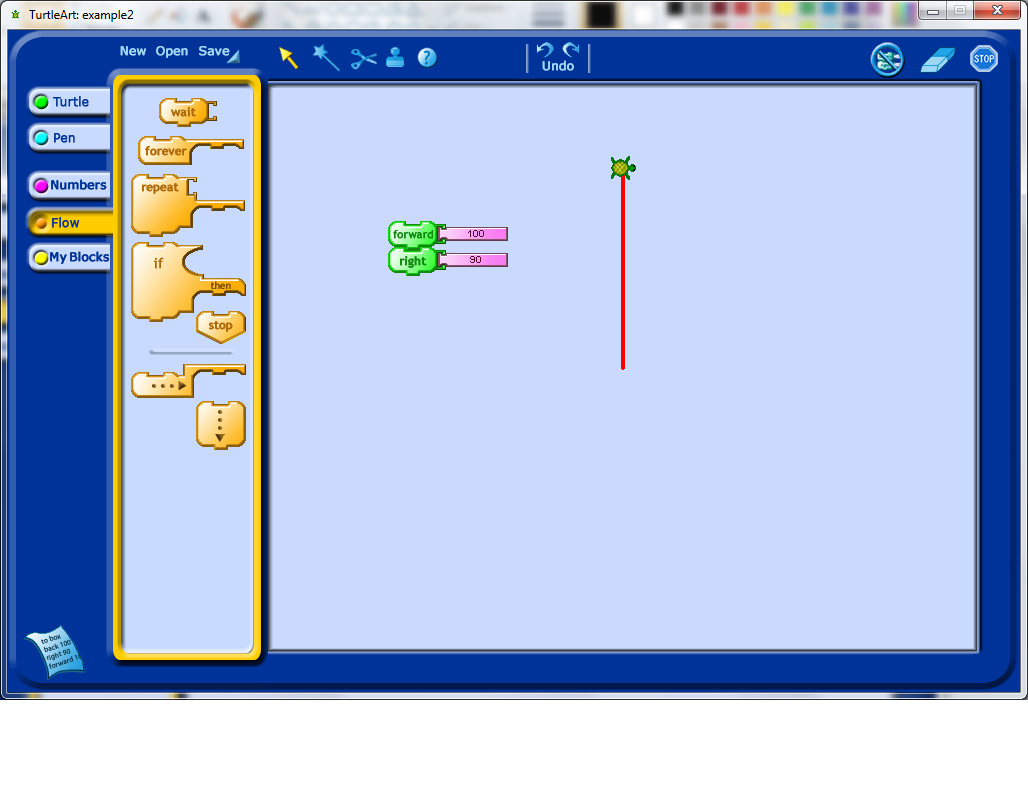
Line segments are most interesting when attached to rotations, so the next block worth showing students is the rotation block. Note that as in the picture below, creating a program with these blocks means attaching them together and double-clicking on the paired blocks to see the output of your program.
Notice that, in the example below, the output is very similar as the first example, except that the turtle icon is rotated now 90 degrees relative to where it used to be.
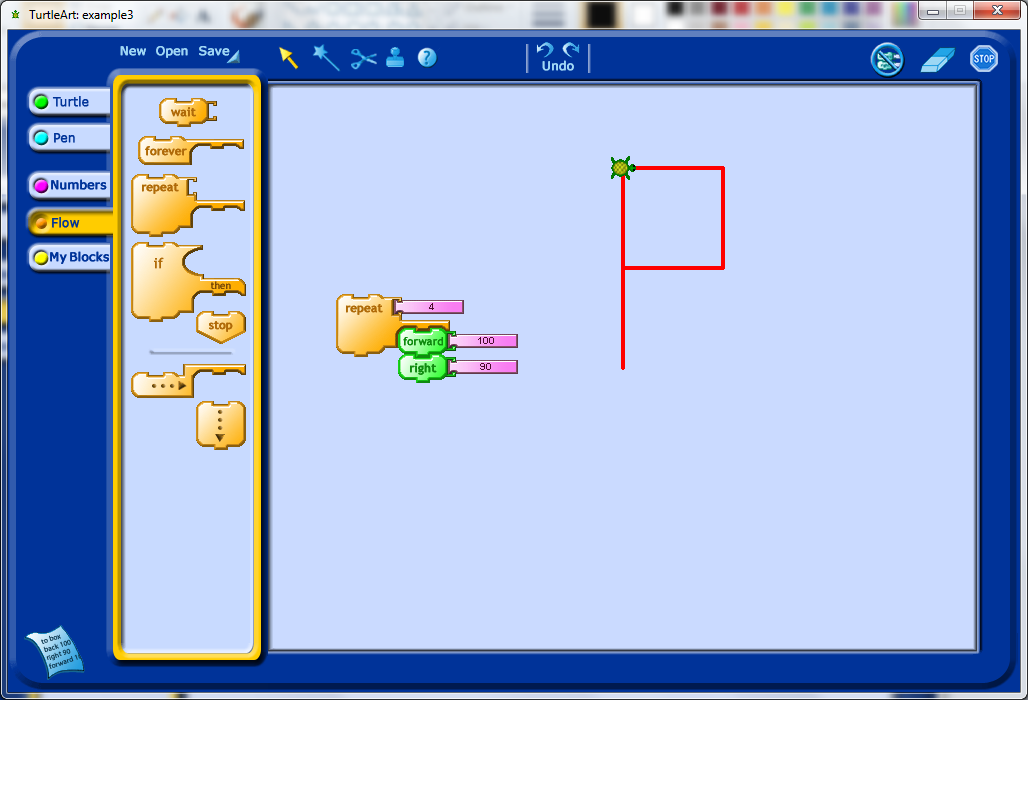
Once students have played with rotations and moving forward, it is probably time to show them how to use the repeat function. The repeat function is one of the more powerful commands in Turtle Art as it allows any subcommands placed inside it to be replicated exactly any number of times.
Notice how you could add a square to your picture at this stage by using the same commands as before, but repeated four times. This suggests that a property of squares is that they can be generated from repeating the steps "forward n, rotate 90 degrees" four times.
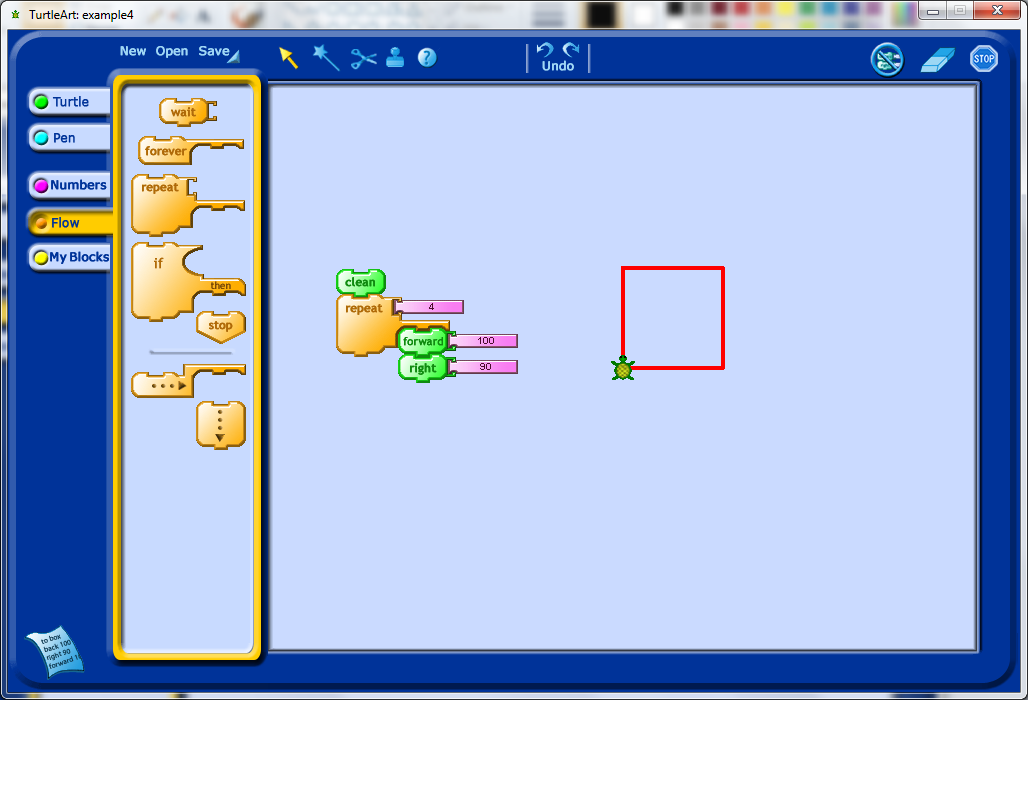
At this point, students may realize that it would be convenient to start fresh each time, and so you can point out the clear block. Note that this block also resets the default starting position of your turtle.
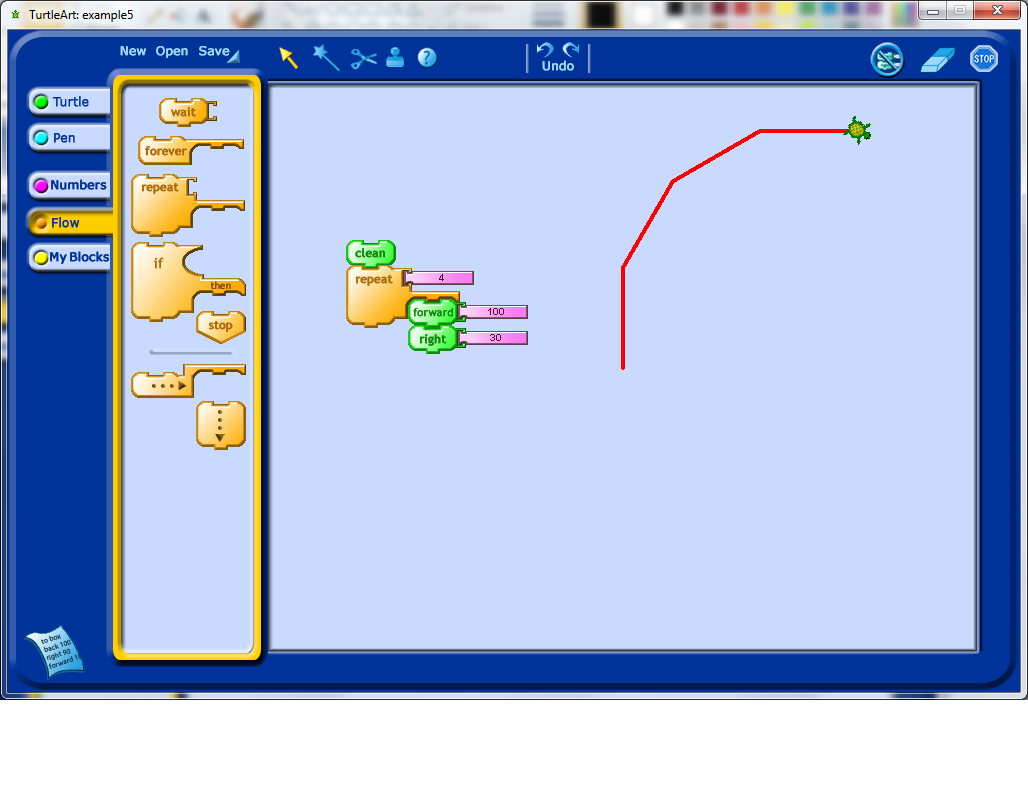
One thing I’ve noticed students do very early on, when they explore Turtle Art programming, is change the angle of rotation. I’ve changed the angle from 90 degrees to 30 degrees in my example, and now all of the shape isn’t a square anymore.
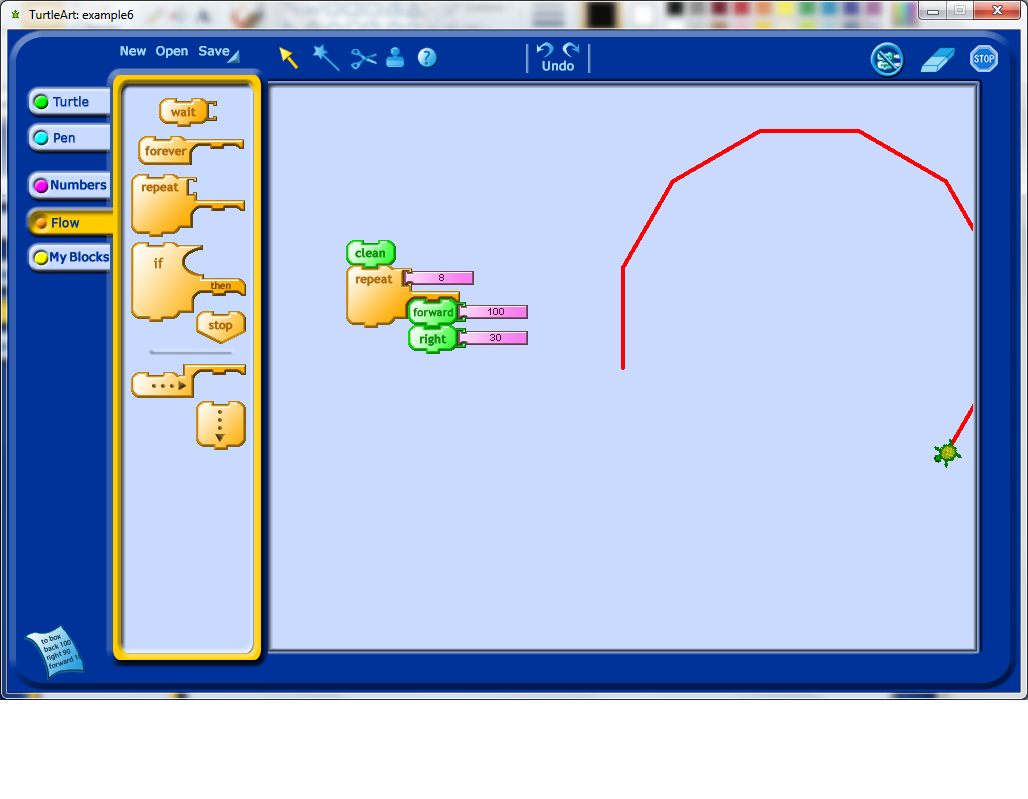
After this, it would be natural to try and figure out how to close the shape one has drawn. Students might realize right away how many rotations they need, and they may need to experiment a bit. This experimentation, along with other related experiments that they will do, may lead them to develop a model for the number of degrees of rotation and how many repetitions of their initial forward plus rotation block they need. Below, pretending that I was a student, I only repeated the commands 8 times.
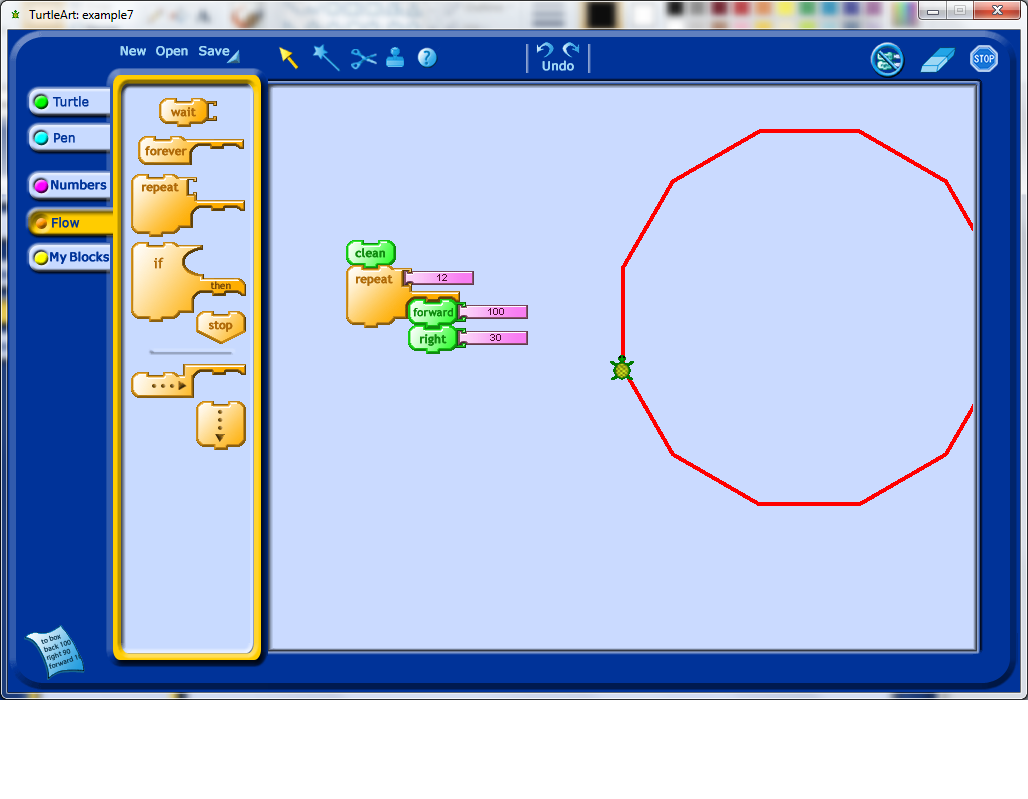
When you see your students have made this kind of discovery, it may be worth checking in with them to see if they have a model in mind for why 12 repetitions worked, and why 11 or 13 would not. In particularly, it would be interesting for them to explore, for example, what happens if they change the angle of rotation? What happens if they change how far they go forward each time?
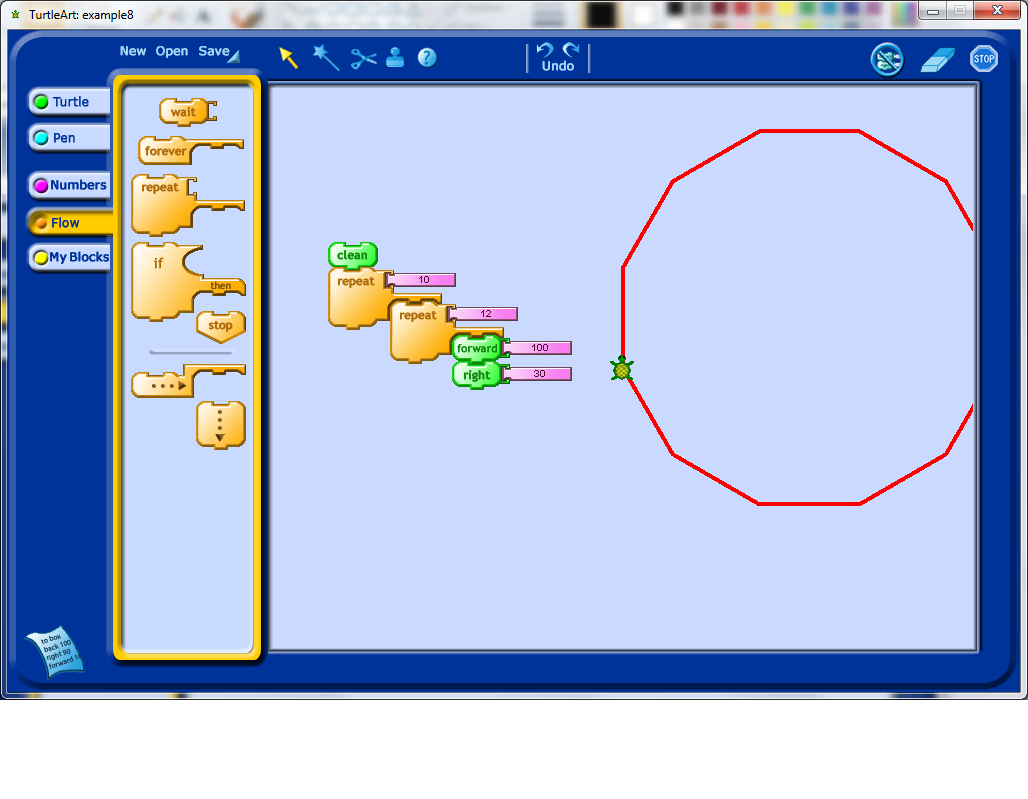
Another thing that I have noticed students often do, once they learn about the repeat block, is stack repeats to see what happens. In this case, the extra repeats do not appear to have changed the output at all, which should hopefully lead to some questions by the student. I would recommend having the students step through the program one command at a time and see if they can understand the reason why the output is what it is.
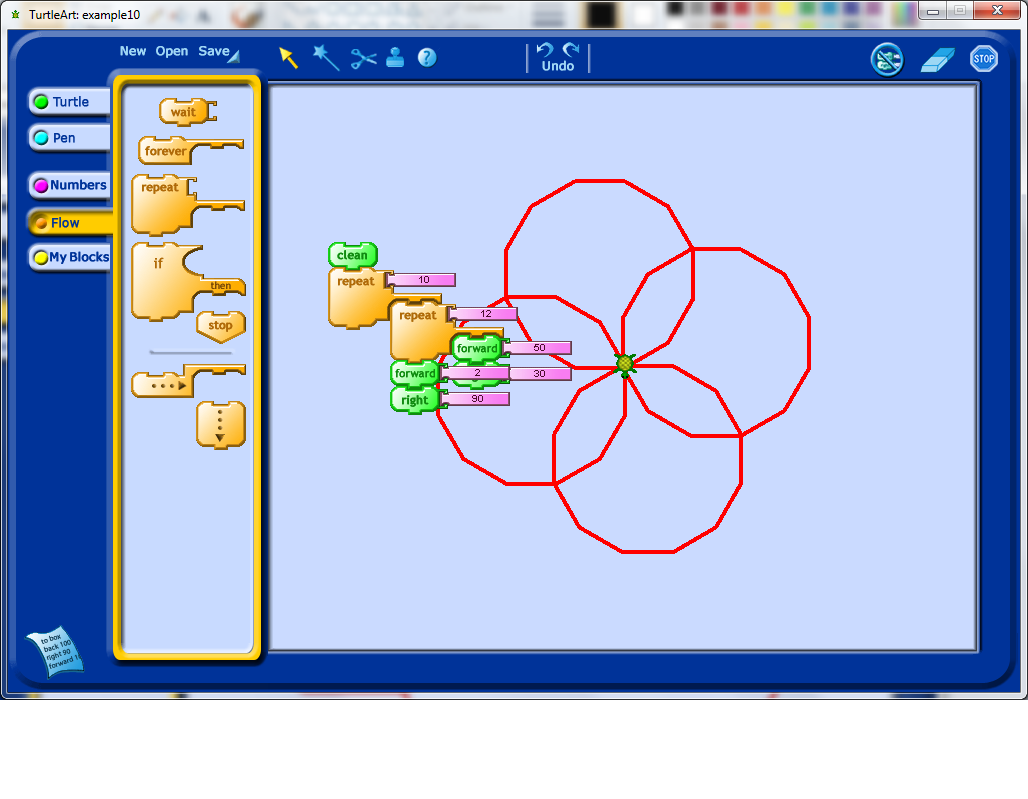
Having understood the issue in the previous step, I decided to add a forward and a rotation into my double repetition, which leads to a fairly interesting shape which unfortunately extends beyond the edges of the view window set by the program.
At this stage, I decided to figure out how to shrink my shape. This, with some prompting, could lead to a discussion about variables. With some experimentation, students may learn that variables are an input into the program they have created which may affect the output of the program.
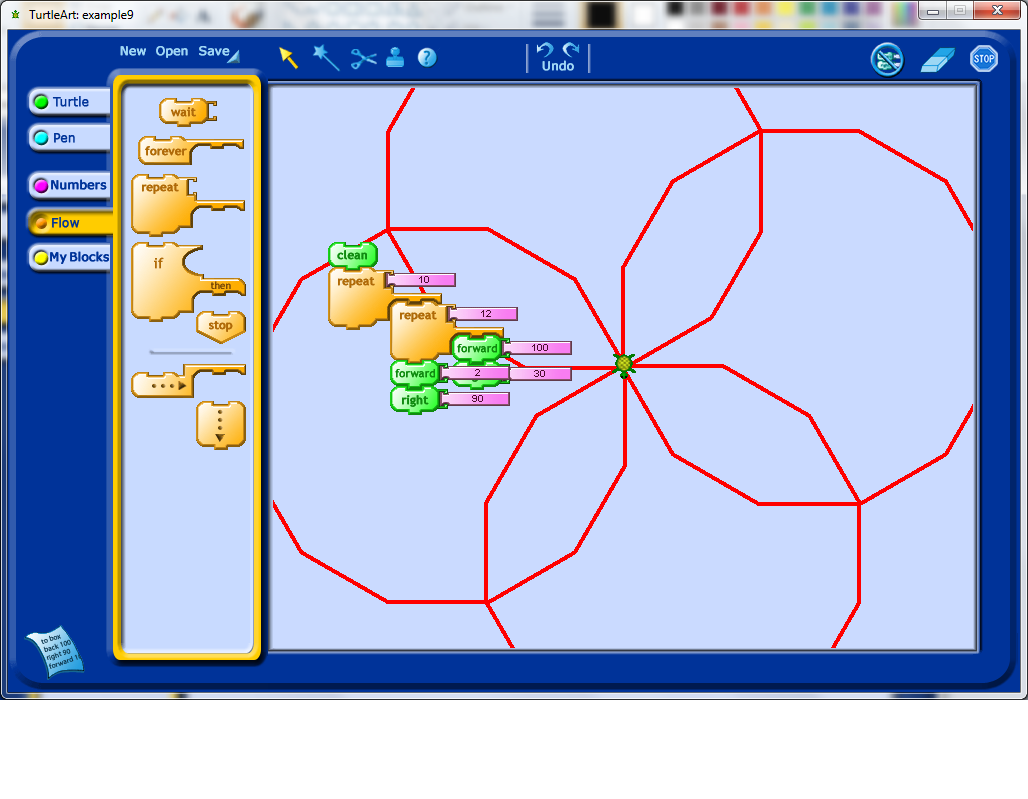
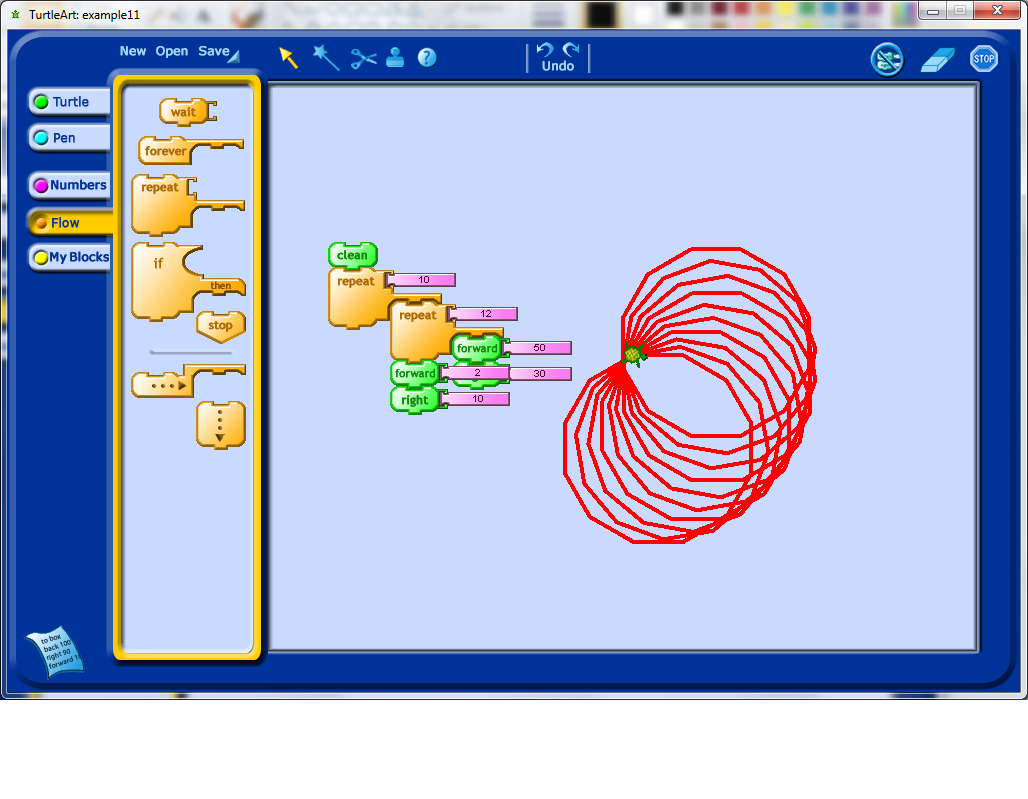
My first instinct after seeing the rotation above was to change the second angle of rotation to only 10 degrees to see how this influenced the output. Right away I decided that I would need to change the number of repetitions for the outside repeat loop. I would encourage any students working on an activity like this to play around with changing the number of repetitions to see if they can figure out how many repetitions will make their pattern repeat all the way around a complete revolution.
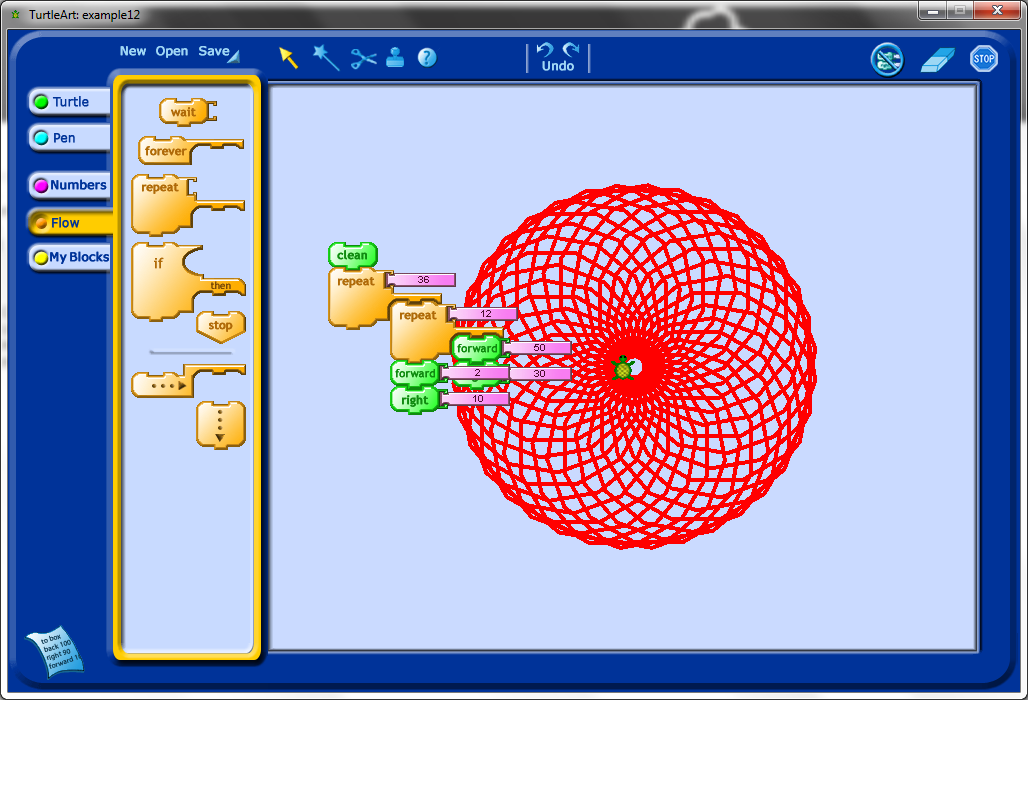
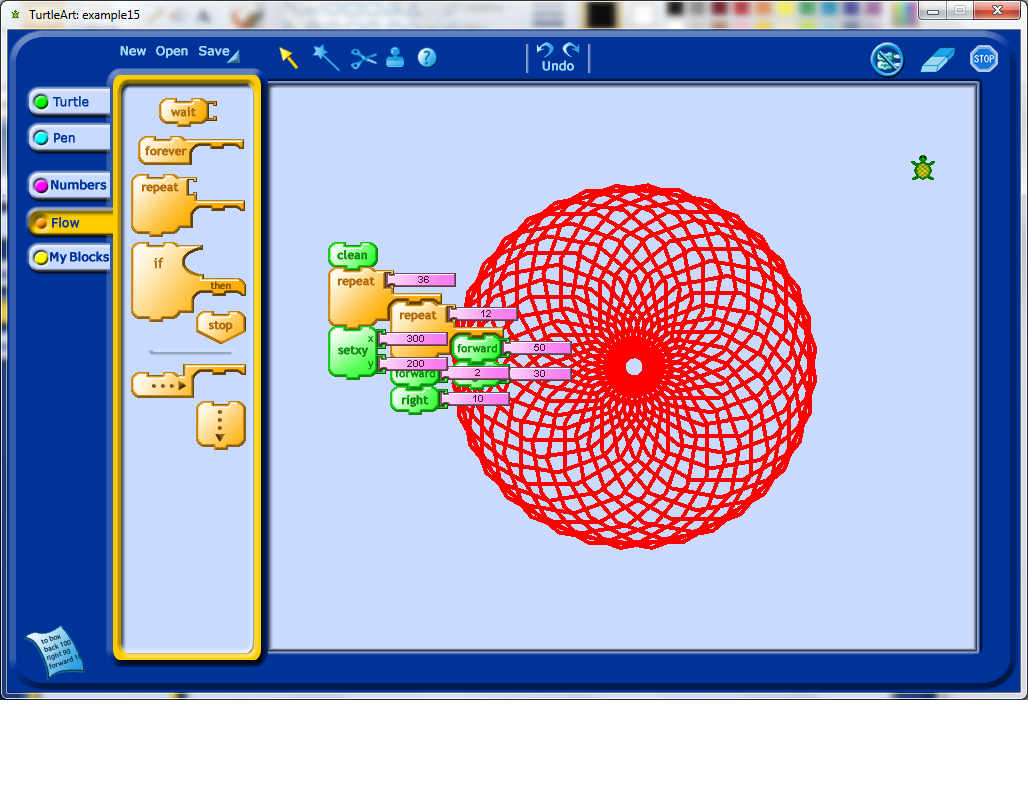
Now we really have an interesting looking shape. Notice that to get this shape, we repeated our outside loop exactly 36 times. Why 36 times, why not another number? What would happen if used a larger number?
I found the Turtle icon sitting in the middle of the other picture to be a bit distracting, so I tried to use setxy (which, by the way, students absolutely find hysterical if you mispronounce it) to move it. Notice that this particular code block would lead to a discussion about Cartesian coordinates, and that through experimentation, especially if students have an understanding of negative numbers already, lead to understanding the purpose of a coordinate system.

I did some further exploration with the setxy tool, trying to get the Turtle icon off of my shape. Note that actually determining the actual size (in pixels) of this shape involves using trigonometry, so one could turn any exploration of shape into a mathematics problem session as well, simply by asking students to try and work out the sizes of the objects they create.

I finally got the Turtle off of the shape.
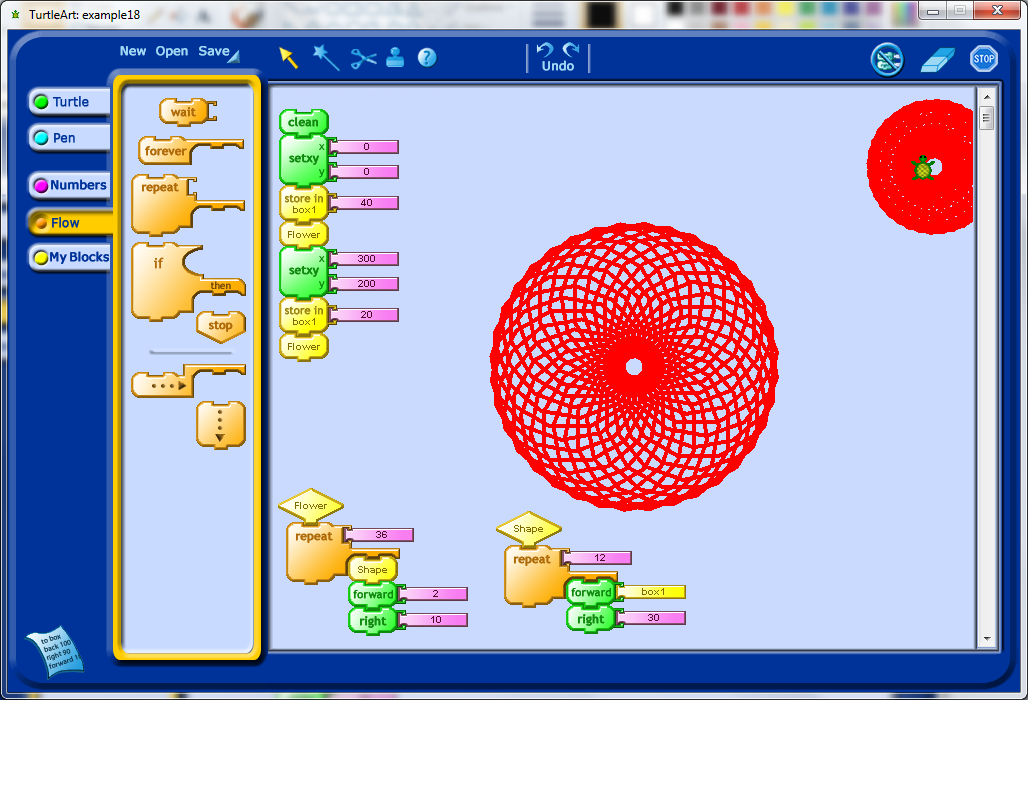
I decided that it would be nice to draw another one of these shapes in the new Turtle location, which meant I had to start changing my code to more easily allow for repetition of the code structures. Turtle Art allows for the person using it to define their own blocks. In this case, I decided to create a procedure called "Shape" which would be used to draw just the original 12 sides shape. I then called this procedure from the main block of code (see below).

I then decided to make the put the rest of the code into it’s own block as well, which I called Flower. If you look below, you’ll see that I first clean the screen, move myself into the middle of the screen, draw the flower, move to the edge of the screen, and redraw the flower shape. It occurred to me that it would be nice to change the size of the flower if necessary. Doing this would require introducing a variable.

I created a variable, which got called box1 (I wonder if I can rename this somehow). I set the value of box1, and then call the Flower procedure, and inside the Shape procedure, the value of box1 is used to determine the amount of forward movement done by the Turtle icon while it draws the Flower shape. To draw a flower of a different size, I changed the value of box1 again, and then called the Flower procedure again.
You should see that even in a relatively simple example, there are a lot of embedded mathematical concepts. Through trial and error, careful observation, and a teacher’s mentorship, students should be able to develop some models of how these mathematical ideas work, within the Turtle Art environment. Besides learning mathematics, students will also have to develop other habits, such as patience, and the willingness to trouble-shoot and debug their programs.
Peter A. Farrell says:
This is a great way to introduce geometry to students. The old way to teach students strict logic was geometric proofs, but using programming, but this is more realistic. The routine won’t run or won’t work right if the student has made a mistake in logic (or math, or spelling…). I have a number of math-through-programming explorations in my book Hacking Math Class with Python. Let me know and I can send you a sample!
March 18, 2016 — 10:44 pm