 Once in a while I have a new application, web applet, or web site I want students to use. Occasionally these programs are somewhat tricky for my students to use, so when this happens, I create a simple video for my students to watch to introduce the programs. Of course, I don’t want to pay any money to create these short tutorials, so I have a simple process I follow (which works on Windows):
1. Use Camstudio to record the video (and audio).
2. Record the short video (usually 2 minutes long or so) as many times as
necessary to get it right rather than editing the video. The free video editors
I’ve seen have not been user friendly at all so I find it easier to re-record.
3. Upload the video to Youtube.com.
4. Post the video using the embed feature of Youtube, or link the video from my
classroom blog.
What do you need to do this? Well first you need a computer fast enough to handle recording the video and processing whatever other program you are working with. Most modern computers should suffice, but still, I tend not to have any other programs actively running at the same time. Also, I’ve noticed that Camstudio tends to have trouble recording certain embedded multimedia (like recording a video of a video can be problematic). The second thing you need is a decent microphone for recording audio with your presentations. I use a simple analog microphone that I plug into my computer, and then I do my recording with as little background noise as possible. Of course you need to download the Camstudio program, which happily you can do from this page for free. The last thing need is a Youtube account, which again is free, as long as your videos are less than 10 minutes long.
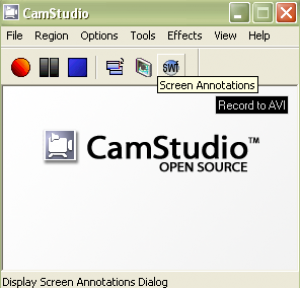
The Camstudio program is divided into a bunch of smaller programs, including Player, Playplus, Producer, and Recorder. Of these programs, the only one I actively use is Recorder, although Player opens up automatically when I finish recording.
 When I start recording, I open up Camstudio Recorder, set up my tutorial space I want to record (whether it is an application, a website, or whatever) and then change the settings in Camstudio Recorder so that I record the part of the screen I want to record.
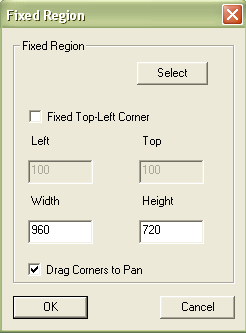
There are a couple of useful settings in Camstudio you should know about. The first is the recording region, available from the top menu under the Region menu. You can either choose a fixed region, the currently active window, or full screen mode. Active Window and Full screen are easy to set up, with Fixed Region I usually select the specific part of the screen I want to record and not select the top corner to be fixed. Some sample settings are shown to the right. This allows me to specific how large the recording window is, and then I can choose where I want the top-left corner to be when I start recording.
The second useful setting is under Options ⇒ Program Options ⇒Minimize program on start recording, which I basically use to hide Camstudio before I start recording.
There are lots of other options for Camstudio which can play around with. I find the program remarkable easy to use, given the power it provides you with. The program does not take up a lot of space or require any special installation, which means you could easily run it from a thumbdrive and take it around with you.
To start recording, you click on the red circle, when you are finished recording you either click on the blue square, or press F9 on your keyboard. If you want to pause for a second in your recording, you click on F8 or on the pair of black rectangles. As soon as you finish recording, Camstudio Player should pop up after the audio is compressed, and show you a preview of the video. If you are satisfied with it, you can login into your Youtube account and upload it. If not, re-record and run through the steps again.
This is an excellent way to produce short tutorial clips for sharing with your students. For the other steps in this process, they are a little bit too complicated to include in this simple tutorial, but there are lots of web pages that explain how to upload a video to Youtube, and then embed that video in your blog. Now you are ready to create your video tutorials!