The Reflective Educator

Education ∪ Math ∪ Technology

Archives (page 96 of 97)

An ideal classroom in which technology is used to facilitate real student understanding could exist, here’s how

Here is a quote from my class.  This guy has it right on.

  • all students would have laptops with integrated cameras, microphones, speakers
  • all students would work through configurable simulations of key concepts
  • all students would have full-time access to all the knowledge (and cruft) on the internet
  • students would track their own learning in a public learning log, possibly using blog or wiki software
  • anything that students say is within their core competency, they can be tested on
  • tests are given one person at a time, whenever the students are ready
  • teachers are there to teach concepts, lead labs, and ensure students are roughly on track with a learning schedule that will ensure they learn all needed concepts for state/provincial standards
  • frequently, students who have learned a concept would take a turn explaining it to the class. Who could do this and how often would be loosely coordinated schoolwide, so that as much as possible all students get opportunities to present in areas of their strengths
  • students would interact with others in learning communities all over the world via Skype. Sometimes a distance or foreign student might lead a discussion on a certain concept. (Note: I’m in conversation almost daily with members of my team in Italy, Norway, Ukraine, China, the United States, and the United Arab Emirates.) The school would seek out 5-6 learning institutions at similar levels and timetables so there’s a baseline of collaborators to start with, but students could talk to anyone if they’re on-topic.
  • teachers would frequently bring in social media output of practicing scientists/mathemeticians who are web2.0 producers when appropriate, helping to show relevance

John Koetsier in ETEC 533.

This kind of classroom sounds fantastic to be in.  Instead of having to spoon feed a bunch of students who don’t really want to know what you are offering anyway, you as a teacher get to become a mentor and guide.  Students would be actively engaged and definitely interested in what they are doing.  Given that in our current system many students learn material which they never use again, and fail to learn even the most rudimentary of research skills, this kind of school would empower students to set their own goals and seek their own understandings of how things work.  The existance kind of school would be a sign that standardized testing would soon be getting a run for its money.

Obviously there are logistical things to work out.  How do we fund such a program, and how to we set graduation requirements so that a time-line for completing of high school still happens?

Questions like, "How do we make sure the students are being productive and not messing around all day?", "Can we make sure that some sort of basic curriculum gets covered in this scenario?", and "Will any students choose hard enough things to study that we will have people entering mathematics, physics and engineering at the university level?" are also a concern.

I think that the first two questions are legitimate, at least in our current paradigm.  I suspect that an open learning style like this would help save money that is spent on various classroom management initiatives (think study hall, detentions, jails…) and save society enough money to pay for these types of schools itself.  The second question is one where we can only answer it by realizing that suddenly, there is no need for a time-line to complete high school.  Students who are able to demonstrate competency in enough areas to attract interest in a university are free to go there.  Otherwise students will be trying to demonstrate their competencies to potential employers instead, and when they are ready, they can leave high school too.

Anyway, if anyone knows a place where education like this occurs at the high school level, or anything like it, let me know I’d love to visit.

What are the characteristics of properly used technology in a mathematics or science classroom?

Here is a question posed in my class this week.

What is a good use of technology in the math and science classroom? What would such a learning experience and environment look like? What would be some characteristics of what it is and what it isn’t?

Here are my thoughts in no particular order.

  • The technology is being used seamlessly in the lesson. Students do not need to spend 5 or more minutes learning the technology because they know how to use it already. This means that new technologies should be introduced separately from their use if possible, or be so easy to use that they require no special instructions
  • Technology should be used to provide simulations or examples which are either difficult to do in real life, or time-consuming. Its purpose should be to demonstrate an idea or help handle repetitive tasks as part of a bigger picture
  • If it is possible and easier to use a non-technological solution to presenting some information, this should be used as experiences grounded in what the children know are preferable (see constructivism).
  • Use of technology to facilitate communication that is above and beyond what is normally possible in the classroom is also an example of an acceptable use of technology. This can be used to extend instructional time outside of the classroom, by providing a classroom blog for instance for students to post questions, comments, and summaries of what they have learned.
  • The people implementing the technology (the teachers or instructional aides) need proper training first, no technology should be implemented by people who are not experts in the technology first. Otherwise, when problems occur, valuable instructional time will be lost when the teachers/aides cannot fix the problem quickly.
  • The technology needs to work without too many major bugs, it needs to be easy to use, and it should run quickly.

A good learning activity would have students using a web applet, for example, or a simple desktop application to run a simulation, and then analyze the data given by the simulation to come to some conclusions about what they have seen. Students would be engaged not by the technology, but by the simulation itself.

I guess that the use of technology should not be simple because it exists, but because it is much easier or less time-consuming than trying to make the same discovery using non-technological tools. I feel like under these circumstances, technology can actually be a useful replacement for a real-life experiment. It could also be useful if an experiment can be done under ideal circumstances in a simulation, and then confirmed in the less than ideal real world

One of my colleagues in the class, Tris says pretty much the same thing.  He gives some different examples though which are worth mentioning.  Specifically:

  • This could be by extending or enhancing a students understanding of an area of content (using a computer simulation or model)
  • speeding up a process (using a graphing calculator to graph functions rather than pen and paper)
  • improving a students grasp of basic concepts (using a computer game [to] memorize timestables)
  • increasing the number of learning styles or intelligences being addressed in the classroom, or reducing the cost of education (making content available online rather than purchasing textbooks – this being a hypothetical argument assuming no copyright issues)

– Tris (posted in the ETEC 533 discussion forums)

His ideas pretty much mirror mine, but I’m including his examples because it provides more ways of using technology in a thoughtful way. I particularly liked how refers implicitly to Howard Gartner’s multiple intelligences theory as a reason for using technology, which I think is excellent. Pretty much every teacher has noticed that students learn differently, and that providing multiple forms of representation of the material you are trying to cover is going to benefit your students. I’ve noticed that my use of daily classroom summaries seems to have helped reduce the gap in achievement between my ESL students and my other students. I should do some research to see if this actually the case, or if I am just imagining the gap closing.

Ian, another of my classmates agrees with me in one point, so I’m going to quote him here, since he says it better than me.

"Ironically, the use of technology in classroom teaching should endeavor to focus as little as possible on the technology as possible…" – Ian

A photocopier.This is a good observation to make since so often it seems technology is just used because it exists. If we think of older technologies, we can see that the ones that have been successful have followed this credo. I’m thinking of the overhead projector, a word processor running on a PC, the photocopier, etc… none of which people think of as "fancy technology" but which have made an enormous improvement on our profession. Can anyone imagine a school with no word processors, no photo-copiers and no overhead projectors?

 These old technologies are just seeing a resurgence in their development actually because of the green environmentalist wave that is sweeping across our society.  So maybe they aren’t so taken for granted as I think…

 What new technologies do we see in use today will become the norm for classrooms for the future?  Is every classroom going to have a smartboard?  Every student with a tablet PC?  Are wireless interfaces going to change the way we interact with technology?  I think the answer is that the same properties that made the older technologies (like a photocopier) so useful are going to be the properties which determine which technologies survive for the future.

Thinking about my first experience with technology

I am currently working on my Masters degree in Educational Technology and as part of my current course we are to create an e-folio for keeping track of our observation. 

Wang PC 240One of our first assignments was to reflect upon an early experience in our lives when we were exposed to or used technology, and discuss how and why we remember the experience.  Most people talked about early computer games or their earliest computers, I chose to talk about my first computer, a hand-me-down Wang.

My father gave me this computer when he bought his new computer, which if I recall correctly was an IBM portable computer.  The cool thing about it was that it came with a BASIC programming interface and an interpreter, so it was also the first computer that I did any programming on.  I had a reference book on BASIC my father had bought, and so I could look up functions and programming structures.  My dad was programming in BASIC at the time as well, so I’m sure I asked him for help once in a while.

What I loved about programming was the ability to make the computer do things (which is still what I love) like manipulating text, graphing graphics from text characters, etc…  I seem to remember constructing fun shapes using ASCII characters like Ascii 200 and Ascii 204.  You could create mazes, etc… and if I recall correctly there was very little space (or no space) between the characters so that the mazes looked seemless.

Over the years I worked on many mini-projects, my favourite being a computer game which I used as my science fair project in 10th grade (I got a C+, apparently you need to do a write-up even if what you’ve done is really cool).  I also remember programming a simplistic word processor, which included a simple word wrap algorithm and the ability to load and save files.  Think Notepad for DOS.

When I went to university, for some reason I set computers aside as a thing to be used as a tool, and used them more for recreation.  Had I paid more attention to them in school, I might have been able to start in this WWW craze much sooner.  Who knows what would have happened?

Anyway this early experience has definitely led me along a life-long path as an early adopter of technology and has helped me become an avid web design enthusiast.  My most recent project, creating desktop applications with Adobe AIR has been quite interesting, and I’m sure I’m not done now.

Communication Online with Students Outside of Class

Once you’ve started working with creating and managing online resources for your students, it becomes natural that the ways the students communicate with you is going to change a little bit.  Here are some guidelines for ways you can communicate with your students, and some ways to protect yourself while doing so.

Last night a student of mine asked me a question while I was online through Google chat.  I didn’t mind answering it, and so we had a quick 5 minute discussion about her project.  This saved me a bunch of time the following day, because I didn’t need to repeat the same conversation with everyone else, I just posted the relevant information to my classroom Math blog and then all of the students had access to it.

Google chat has a very handy safety feature for teachers, it automatically records your chat history, which you have access from your Google mail account.  This means that you can easily protect yourself from any accusations of misconduct which might occur.  This process is very similar to a student calling you on your phone and so the same principles apply.  If you don’t want a student trying to contact you via Google chat, don’t give out your gmail address.

You can also communicate quite effectively with students via email.  This has the advantage of allowing multiple students to receive responses, being able to record your conversations for later, and finally being able to send responses when it is convenient for you.  I hate it when students come up to me immediately after a class and ask a bunch of detailed questions because I almost always need to go to the bathroom, or prepare for another course, or get a snack.  These are the times when being able to send an email later is very handy.

Google mail has two neat features that make email with students a bit easier to manage.  The first is that you can apply a label to any email message sent or received between you and a student, which is a handy way of finding messages from students in specific classes.  The other feature I like is called filtering, which can allow you to perform automatic actions on emails that you receive depending on the sender, the contents of the email, etc…  One of the things I like to do is automatically label student emails by class when I receive them.

Finally, never delete emails between you and a student.  They are proof that you have been trying to help the student, which can be useful for administrative reasons I won’t go into here.  You can keep them to help yourself remember what types of questions ask about particular topics.  Finally your record helps protect you from potential problems later.

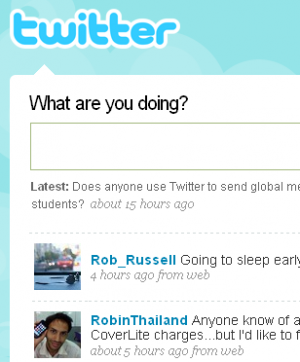
An interesting and relatively new way to communicate with students is through a website called Twitter.com.  This website basically acts as a place where you can post a quick (140 characters maximum) message to the world, and anyone who is "following" you gets a copy of the message.  Since you can forward messages sent to you to your cell phone, it allows you to receive messages from an online source quickly and easily to your mobile phone.  This can be an easy way to set up a one-way broadcast system between you and each of your students in a particular class.  As long as you don’t "follow" your students’ messages, you won’t get any messages from your students that you don’t want.

Emails and chats are good for 1 on 1 or 1 on a few types of communications, but by far the best tool I have used for communication with my students is my classroom blog, described in another post.  Basically, I post information, worksheets, assignments to my mathematics blog, and students can all come read it on their own time.  The information is totally public and always available to look at later.  I also have students do daily summaries of what happened in class, which means I have a record of all of my lessons.  Students are free to post comments, which gives me some idea of what the class understood, and what they had difficulty.  For some reason I find my students are a bit more honest when responding on the blog, or rather less likely to remain silent about difficulties.  In fact, I’ve enacted policy changes because of legitimate complaints students have brought up through the blog, so it has acted as a tool to empower students as well.

These are 4 ways you can communicate online with your face to face students on a day to day basis.  Although we all don’t want our professional life to creep into our personal life too much, we also want to make sure that we help our students learn effective modes of communication, and that they have the help they need to handle those difficult projects we seem to be throwing at them endlessly these days.  Stay tuned for a future article about how to use Dimdim.com for communicating with up to 20 students simultaneously for free.


Using Camstudio to Create Videos Tutorials

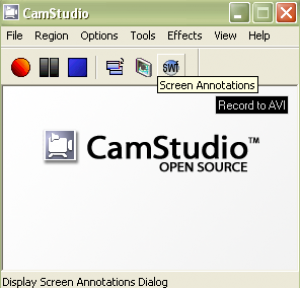
Once in a while I have a new application, web applet, or web site I want students to use.  Occasionally these programs are somewhat tricky for my students to use, so when this happens, I create a simple video for my students to watch to introduce the programs.  Of course, I don’t want to pay any money to create these short tutorials, so I have a simple process I follow (which works on Windows):

1.  Use Camstudio to record the video (and audio).

2.  Record the short video (usually 2 minutes long or so) as many times as
     necessary to get it right rather than editing the video.  The free video editors
     I’ve seen have not been user friendly at all so I find it easier to re-record.

3.  Upload the video to Youtube.com.

4.  Post the video using the embed feature of Youtube, or link the video from my
     classroom blog.

What do you need to do this?  Well first you need a computer fast enough to handle recording the video and processing whatever other program you are working with.  Most modern computers should suffice, but still, I tend not to have any other programs actively running at the same time.  Also, I’ve noticed that Camstudio tends to have trouble recording certain embedded multimedia (like recording a video of a video can be problematic).  The second thing you need is a decent microphone for recording audio with your presentations.  I use a simple analog microphone that I plug into my computer, and then I do my recording with as little background noise as possible.  Of course you need to download the Camstudio program, which happily you can do from this page for free.  The last thing need is a Youtube account, which again is free, as long as your videos are less than 10 minutes long.

The Camstudio program is divided into a bunch of smaller programs, including Player, Playplus, Producer, and Recorder.  Of these programs, the only one I actively use is Recorder, although Player opens up automatically when I finish recording. 

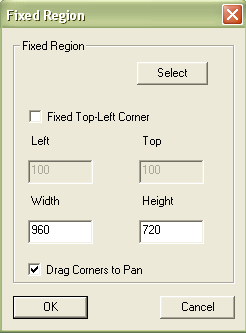
When I start recording, I open up Camstudio Recorder, set up my tutorial space I want to record (whether it is an application, a website, or whatever) and then change the settings in Camstudio Recorder so that I record the part of the screen I want to record. 

There are a couple of useful settings in Camstudio you should know about.  The first is the recording region, available from the top menu under the Region menu.  You can either choose a fixed region, the currently active window, or full screen mode.  Active Window and Full screen are easy to set up, with Fixed Region I usually select the specific part of the screen I want to record and not select the top corner to be fixed.  Some sample settings are shown to the right.  This allows me to specific how large the recording window is, and then I can choose where I want the top-left corner to be when I start recording.

The second useful setting is under Options ⇒ Program Options ⇒Minimize program on start recording, which I basically use to hide Camstudio before I start recording.

There are lots of other options for Camstudio which can play around with.  I find the program remarkable easy to use, given the power it provides you with.  The program does not take up a lot of space or require any special installation, which means you could easily run it from a thumbdrive and take it around with you.

To start recording, you click on the red circle, when you are finished recording you either click on the blue square, or press F9 on your keyboard.  If you want to pause for a second in your recording, you click on F8 or on the pair of black rectangles.  As soon as you finish recording, Camstudio Player should pop up after the audio is compressed, and show you a preview of the video.  If you are satisfied with it, you can login into your Youtube account and upload it.  If not, re-record and run through the steps again.

This is an excellent way to produce short tutorial clips for sharing with your students.  For the other steps in this process, they are a little bit too complicated to include in this simple tutorial, but there are lots of web pages that explain how to upload a video to Youtube, and then embed that video in your blog.  Now you are ready to create your video tutorials!

Tips for keeping your digital self organized using Google applications and services

In today’s modern world, teachers are faced with an ever more difficult task of keeping their resources and their lives organized.  It feels like greater demands are being expected from teachers and that our job is becoming more difficult.  Here are some simple things you can do to both keep yourself more organized, and in the long run save yourself a lot of time.

Google has a number of wonderful applications, and I’m going to talk about a couple of them in a bit of detail here because they will help you immensely, once you know their power.  I have been using the calendar application provided by Google for a year and a half now, quite successfully, to both store my lesson plans, and keep track of my schedule.  The other application I use multiple times daily is Gmail.

It has a number of important features that I should mention.  The first is that you can have as many calendars as you like, and switch the display between the calendars.  This allows you to, for instance, share a calendar with someone else and overlay your calendars to find a common meeting time by looking for the places where neither of you have something scheduled.  It also allows you to edit a private calendar and then easily switch to editing a public calendar.  Another nice feature is the ability to subscribe to your calendar and receive daily reminders about what you have planned for the day in email form.

The best feature of the Google calendar, in my opinion, is the ability to set it as either private or public.  When your calendar is private, you can invite individual people to view your calendar, but otherwise it remains hidden from the public.  My wife is subscribed to my calendar and I to hers, and we can share information between the two of us pretty easily.  However I also have a public calendar I’ve created and I provide a link on my class blog so the students can see the calendar.

As for Gmail it has a number of cool features.  The interface is extremely easy to use, and includes useful features like creating automatic filters for your incoming email messages, labelling conversations to make them easier to find in the future, and built in chat with other Gmail users.  You can also add widgets to your Gmail page, like for example embedding a display of your personal Google calendars or a comic of the day application.  The size allocated to you is gigantic at over 7 gigabytes of space and counting.  I almost never delete any of my messages, and with their custom "Search your mail" feature, you’ll never lose an email again.

Both of these applications work together to provide you much of the power of Outlook on Windows, but accessible from anywhere you have an internet connection.  As well, I am fairly sure you can access these two applications from your iPhone or Blackberry, and I have some seen tutorials on keeping your portable information devices synced with your Google applications.  These two applications together can save you a lot of time and effort keeping track of information you have received and things you have to do.

I’ve been using Google Sites with my students on a recent project, and it is a very easy way to create a website, either for personal or professional use. You can easily create multiply web sites, and invite students (or anyone with an email address) to help you build a site, while keeping your other sites separate. As well, each site can individually be set to be publically viewable, or viewable by invite only.

In your Google sites you can embed pictures, videos, and Google calendars. This gives you an easy way to take the calendar you created using Google calendar and display it for your students, allowing students and parents to view your school schedule. Saves a lot of time when negotiating with your students about when to meet them for extra tutoring.

Try out these web applications sometime. Trust me, you won’t regret it.

Ways to use Geogebra in a mathematics classroom

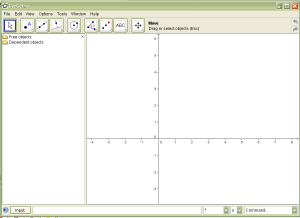
There are a lot of good open source programs out there, but not many of them have direct application to a mathematics classroom the way Geogebra does.  Geogebra is a software package for creating and manipulating geometric objects.  It also allows for graphing of funcitons and manipulating the functions in all sorts of interesting ways.  It runs on the Java framework, which means if you have Java installed on your computer, you can run Geogebra, which makes it any Java enabled operating system.  This means the very same program will run on Windows, Mac, Linux or Solaris, although the installer is different for each operating system.

If you are planning on using the program with your students, it is nice to know that they can install the program for free, and that it is very likely to work on their computer.  The only caveat is that you need to make sure the students have the right version of Java installed if they have any problems as this can sometimes be an issue.

Geogebra has all of the standard Geometry software functions.  You can add lines, circles, ellipses and all other sorts of geometric functions to the document.  You can also make one object a dependent of another object which means that changes in the original object propagate to its dependent objects.  So in other words, if a you draw a line segment which depends on the location of point A and point B, changing either point A or point B modifies the line segment.

There are 2 cool things I like about Geogebra.  The first is that you can export your working file as a dynamic worksheet on a web page, which means you can easily make what you are working on web ready.  The second feature which I use all of the time is the ability to export my current file as a picture in PNG (and a few others) format.  This allows me to use Geogebra to create graphs for inclusion in my online posts, something my students and I use Geogebra for all the time.

Geogebra also has an input textfield, which means that every command you can use the interface to enter, you can also type in.  Some commands are done much more easily through the input textfield, things like entering y = x^2 + 3x which uses the nature notation to graph a function.  Entering Function[x^2, 0, 2] graphs the function over the domain from 0 to 2 for x.  Very handy.

Using Geogebra with your classroom is an affordable way to bring high quality geometry software to your classroom at an extremely affordable price (its free!!).  I’ve only scratched the surface of what Geogebra is capable of doing, I suggest you try it out yourself.  Maybe when I have time I’ll create some tutorials on using it.


Resource sharing between teachers.

As part of my Masters degree, I have created a venture pitch for a project I am working on called Pedagogle.com.  Our assignment was to create a pitch as if we are the CEO of an organization which is looking for venture capital.  We are essentially creating our own start up idea, and then learning how to create a pitch to market our idea.

The process has been quite fun, although I have found myself wading through problems editing the video, and getting the quality of the video high enough to make it worth watching.  I tried unsuccessfully many times to convert it into FLV format to reduce the size of the file a bit, but found the quality degraded too much to make it worthwhile.  So I gave up, and settled on both embedding the file within a page, and providing a link to download the file as an AVI.  Hopefully everyone can figure out a way to watch the pitch.  Unfortunately this means the file size is sitting just under 50 MB which is pretty large.  I’m not going to want to host this myself for too long…

The idea of my pitch is to introduce how organization of information has evolved over time and to place Pedagogle as a logical step in that process.  As I go through the pitch I introduce some benefits of Pedagogle, but am mostly focussing on the organizational benefits as I see those as the most important reasons why a teacher might want to use this resource.

On the page where my venture pitch begins, I describe some other reasons for using my service, including the fact that other people will use it which improves the pool of available resources and that your resources are automatically backed up for you, reducing the likelihood of computer malfunction costing you hundreds of hours of work.

Anyway, check out the pitch and the site, Pedagogle.com and let’s see if we can make a difference in the lives of educators.

Formatting mathematics equations online

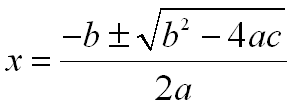
One difficulty faced by any mathematics teacher who wants to present material online is formatting of their documents.  Ideally, you’d like to be able to add equations to your online documents as easily as you can to Microsoft Word.  Unfortunately, this is not the case.

Over the past three years, I have researched a number of options.  There are no simple solutions to this problem, just solutions with varying degrees of difficulty.  A number of these solutions are within reach for your students to use as well, should your students be involved with any of your online projects.

The simplest solution I have found is unfortunately using a propietary program.  Basically the steps are as follows.  You open up Microsoft Word, and confirm you have the bundled Equation Editor installed.  This is likely to be true in Word 2003, and virtually assured in Word 2007. 

Basically the steps are as follows.  You create the equation using Equation Editor.  It really is one of the easiest programs to use.  Unfortunately, in both 2003 and 2007, the equation is not immediately an image, it is and object in a Word document, so you need to find a way to export it out of the program.  If you are using 2003, what you basically create a screen-shot of what appears in your monitor, and paste the result into a simple image editor.  Crop the screen-shot appropriately, save it as a file, and you are good to upload your image for insertion into your online document.  In 2007 you don’t need to create a screen-shot, you can just go to File ⇒ Save As ⇒Word 2003.  Microsoft Word automatically converts all of the equations in your document to images, which you can then Copy and Paste into some image editing software one at a time and save as pictures.

The benefit of this process is that the creation of the equations is relatively straight forward.  However, this process is a bit tedious especially if you have a lot of equations to produce.

Another option is to create the equations is to use an online equation editor such as the one available at http://www.sitmo.com/latex/.  This allows you to enter in LaTeX and produce an image of your equation.  So you enter the very cryptic x = \frac {-b \pm \sqrt{b^2-4ac}}{2a} and it turns it into the equation .  Fortunately on the page in question their editor allows you to modify the LaTeX using some buttons, which simplifies the process.  You can also preview the result of your LaTeX to make sure it is correct.  You then save the resulting preview image to your computer, and upload and insert it into your post.

There are two problems with this solution.  The first is that if Sitmo goes out of business, you lose the ability to add equations in this manner.  The second problem is that you again, have to create each equation one at a time, and upload them one at a time to your online document.  The benefit of this solution is that it doesn’t require you to install any software and will work on any computer, anywhere.

A third solution is to host your own CGI on your server to convert your own LaTeX that you type into your interface to create the documents, and it is converted automatically into an equation image for you.  This is ideal, except that whether or not it works depends a lot on your server set up, and what content management system you are using.  For Drupal there is a module you can add which does this, called Mathfilter which I know works, since I wrote the module.  You can use it, and apply a patch suggested by one of the Drupal developers, to produce very similar equations.  [tex]x = \frac {-b \pm \sqrt{b^2-4ac}}{2a}[/tex] becomes  using the filter.

The problems with this 3rd solution are numerous which essentially all boil down to needing some technical expertise to install the system, and needing knowledge of LaTeX to use it.  The benefit is, you become in charge of when and where you insert equations into your documents, and you can insert them on the fly as you create your document.

Whatever method you choose, it is clear that including mathematical equations online is feasible, even if none of the solutions is really mature. 

Working with a 1 to 1 laptop program

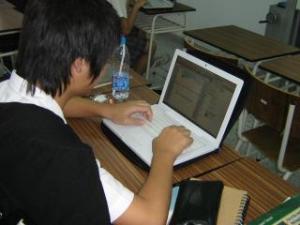
At our rather large high school in Thailand, we have a 1 to 1 laptop program.  Every student in the high school has a laptop, which they are supposed to bring to class.  After a year and half working with these laptops, I discovered the joys and pitfalls of such a system.

The really nice thing about the laptops is that you can plan activities that require a computer much more easily than schools where you have to book time in a computer lab.  Having done both, the laptops are just plain easier to work with.

Another advantage of the laptop program is that a greater percentage of the students you work with have an intermediate level understanding of how their computers work.  They can manage their documents in a relatively organized fashion, install software, navigate the web, and use a search engine, all with relative ease. It has been very rare when I have not been able to explain to one of my students how to accomplish a task.  I find myself being able give instructions to the students using higher level skills and more complicated phrases than my previous school.

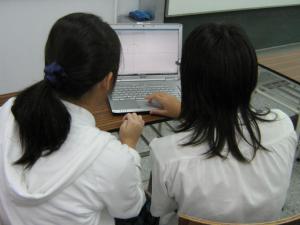
For example, I can tell the kids to ‘copy and paste’ and to ‘create a screen-shot’ and most of the kids know how to do this stuff.  I can also give instructions like ‘copy the URL for the image and paste it into the textfield on the image uploader’ and they can do it.

Another nice feature of the 1 to 1 laptop program is that it allows me to include a little bit of tech training in my lessons.  Since it is likely that the students will be using a computer pretty regularly for the rest of their lives, it seems to me that the use of a computer is one of the most important skills I can pass along to my students.

Since the students have access to a computer at any time, you can use a number of online tools quite effectively.  I have mentioned in a previous article about using Google Docs for collaboration online, and with my classes I have also successfully used blogs, wikis and other resources I have found online with my students.

There are a number of problems with the use of the laptops however which need to be pointed out.

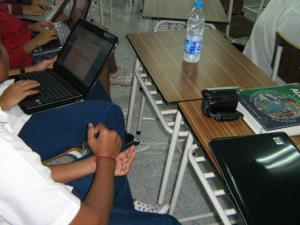
The first problem is that if you plan a lesson that involves everyone needing a laptop and one or more students does not have their laptop, you can find yourself going to your backup pretty quickly.  Students have difficulty keeping their laptops virus clear because of all of the file sharing they do.  They also sometimes just forget their laptops at <insert the location here>.

Another problem, at least at our school, is that there seem to be some limits as to how many students can access a wireless acccess point at the same time.  So once the first 15 or so students in your class get started, the next 5 or 10 students are locked out.  This can be pretty frustrating pretty quickly.

Students will also tend to use their laptops for inappropriate things during your lessons.  The student in the back that you think is diligently using their laptops for taking notes is probably text chatting with their friend in Physics or Biology.  Students who are supposed to be carefully working from a PDF version of their textbook are actually surfing blogging sites looking for next year’s fashion.  This can be real problem, and as usual you need to rely on your own classroom management skills to try and curb this kind of behaviour.  Some schools install special software on the network server to limit students access to the internet, but the kids in your class will probably just turn to computer games instead.

When all is said and done, I have enjoyed the access to a 1 to 1 laptop program I have had at my current school.  There have been some problems, but they have not been insurmountable.  It is likely that more and more schools will be looking to initiate similar programs, so we as educators must prepare for the future.