Education ∪ Math ∪ Technology

Tag: programming (page 1 of 1)

Ways to use technology in math class

Here are some ways you can use technology in your math class which are more interesting and innovative than using an interactive white board or having students watch instructional videos. Note that these ideas are all examples of potential student uses of technology.

Students could:


Any other suggestions of ways students can use technology in order to improve their mathematical reasoning?

Learning Math Through Programming

My previous article focused on using programming as an example of applying math one already knows to a different context. The purpose of this article is to describe how one could, through programming, learn a new mathematical concept.

What I will do is use some examples to show one could start with an exploration using Turtle Art (which is a programming environment designed for kids) and use this exploration to end up developing models of how a few areas of mathematics work. You can download the examples here and open them up in Turtle Art to explore them yourself.

In Turtle Art, programming is done through the use of snappable blocks, each of which represents a different programming structure. It is very similar to the Scratch programming environment, both of which are based off of the Logo programming language. Any decent exploration of Turtle Art should start with attempting to snap different blocks together and see what they do.

You could show students how to use one of the simplest blocks, the forward block. The output of this block is shown below.

Line segments are most interesting when attached to rotations, so the next block worth showing students is the rotation block. Note that as in the picture below, creating a program with these blocks means attaching them together and double-clicking on the paired blocks to see the output of your program.

Notice that, in the example below, the output is very similar as the first example, except that the turtle icon is rotated now 90 degrees relative to where it used to be.

Once students have played with rotations and moving forward, it is probably time to show them how to use the repeat function. The repeat function is one of the more powerful commands in Turtle Art as it allows any subcommands placed inside it to be replicated exactly any number of times.

Notice how you could add a square to your picture at this stage by using the same commands as before, but repeated four times. This suggests that a property of squares is that they can be generated from repeating the steps "forward n, rotate 90 degrees" four times.

At this point, students may realize that it would be convenient to start fresh each time, and so you can point out the clear block. Note that this block also resets the default starting position of your turtle.

One thing I’ve noticed students do very early on, when they explore Turtle Art programming, is change the angle of rotation. I’ve changed the angle from 90 degrees to 30 degrees in my example, and now all of the shape isn’t a square anymore.

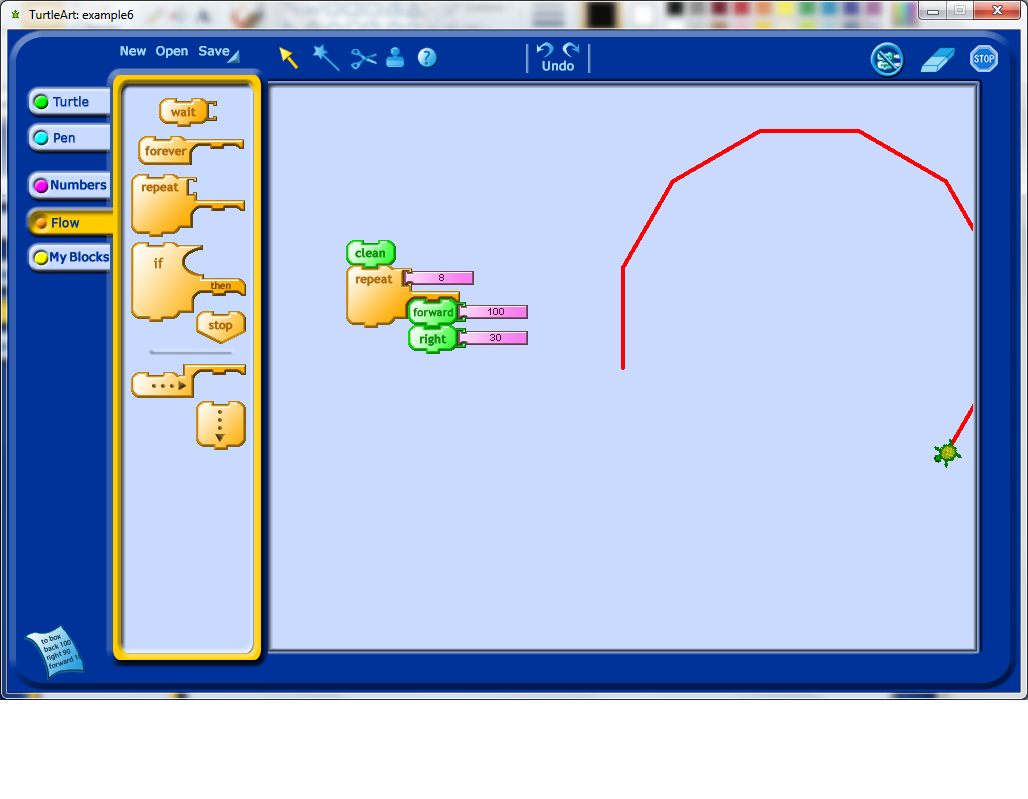
After this, it would be natural to try and figure out how to close the shape one has drawn. Students might realize right away how many rotations they need, and they may need to experiment a bit. This experimentation, along with other related experiments that they will do, may lead them to develop a model for the number of degrees of rotation and how many repetitions of their initial forward plus rotation block they need. Below, pretending that I was a student, I only repeated the commands 8 times.

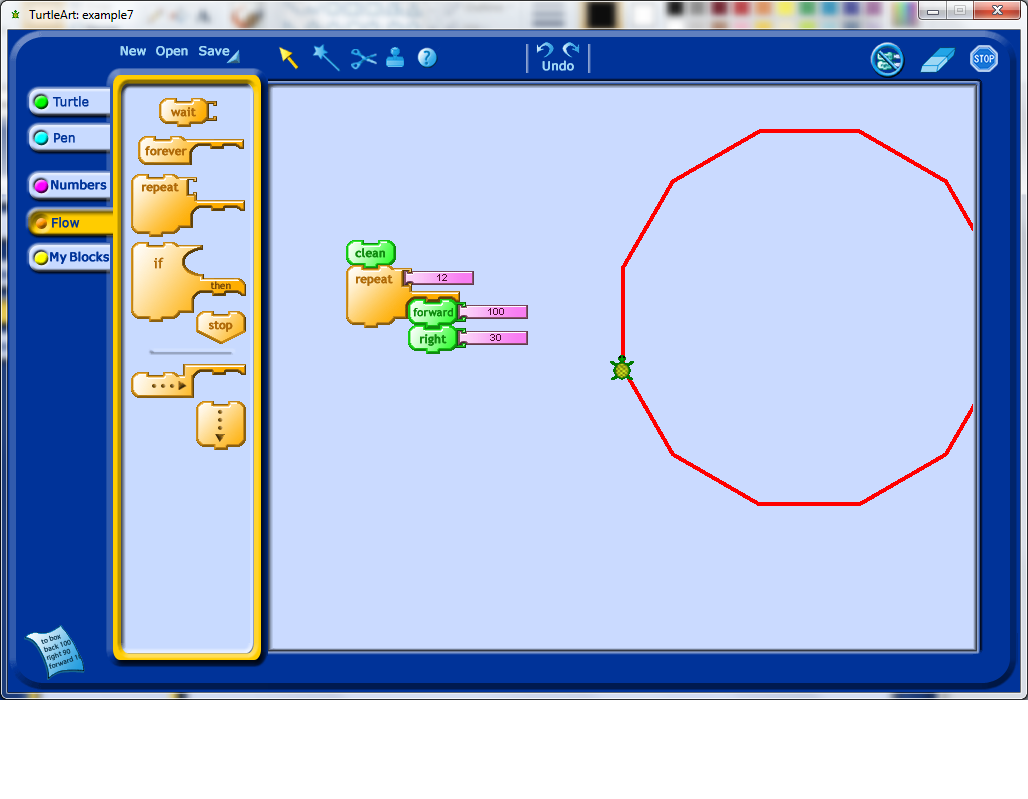
When you see your students have made this kind of discovery, it may be worth checking in with them to see if they have a model in mind for why 12 repetitions worked, and why 11 or 13 would not. In particularly, it would be interesting for them to explore, for example, what happens if they change the angle of rotation? What happens if they change how far they go forward each time?

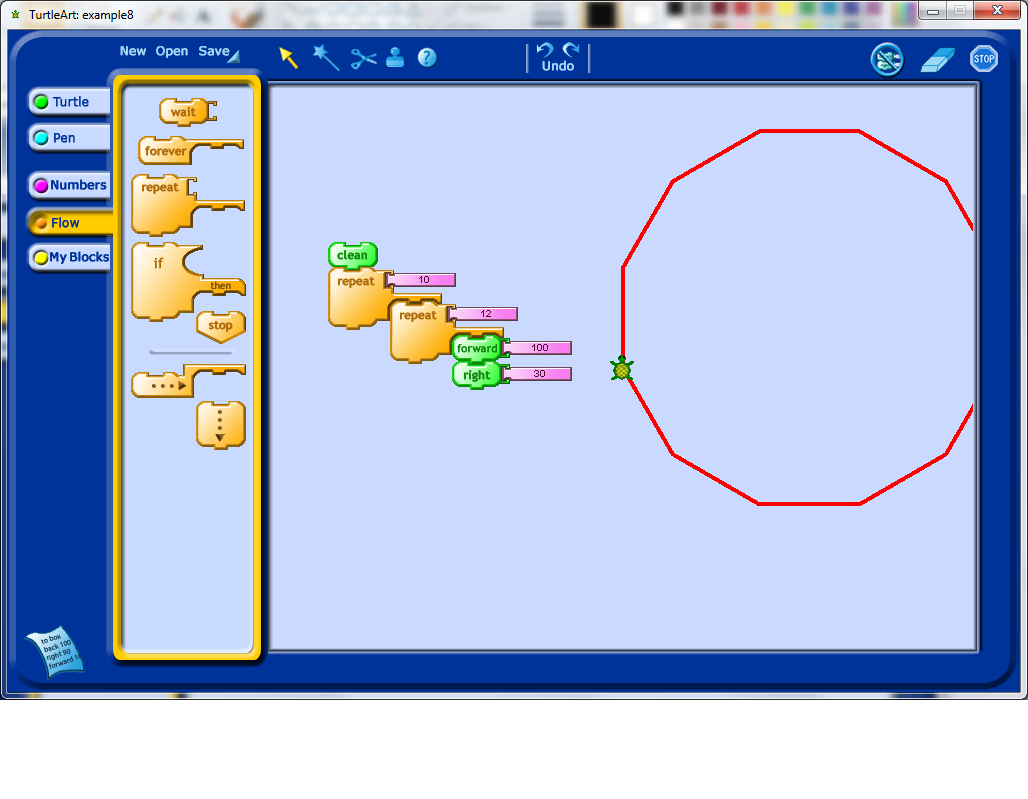
Another thing that I have noticed students often do, once they learn about the repeat block, is stack repeats to see what happens. In this case, the extra repeats do not appear to have changed the output at all, which should hopefully lead to some questions by the student. I would recommend having the students step through the program one command at a time and see if they can understand the reason why the output is what it is.

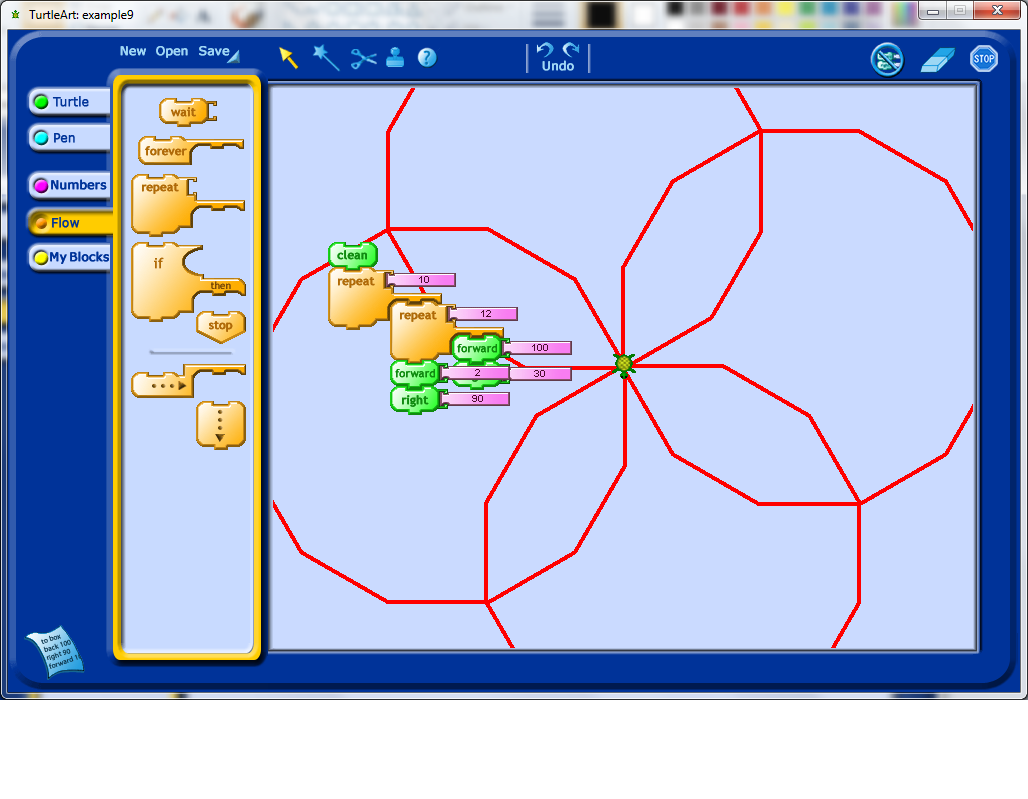
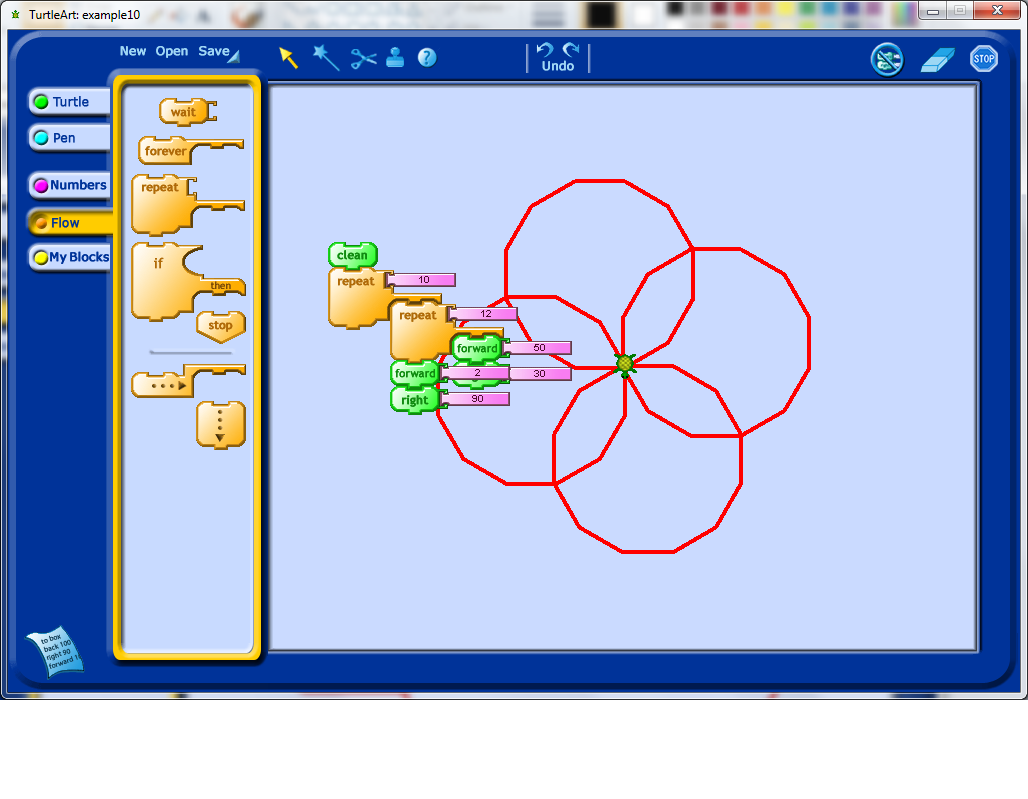
Having understood the issue in the previous step, I decided to add a forward and a rotation into my double repetition, which leads to a fairly interesting shape which unfortunately extends beyond the edges of the view window set by the program.

At this stage, I decided to figure out how to shrink my shape. This, with some prompting, could lead to a discussion about variables. With some experimentation, students may learn that variables are an input into the program they have created which may affect the output of the program.

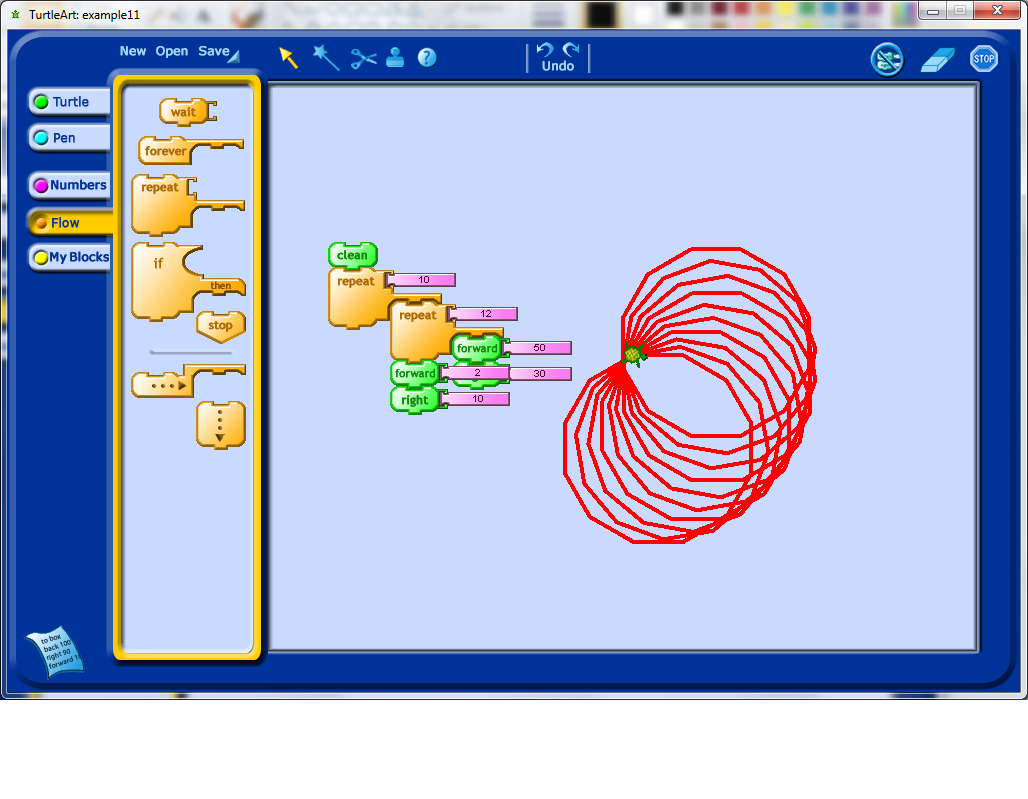
My first instinct after seeing the rotation above was to change the second angle of rotation to only 10 degrees to see how this influenced the output. Right away I decided that I would need to change the number of repetitions for the outside repeat loop. I would encourage any students working on an activity like this to play around with changing the number of repetitions to see if they can figure out how many repetitions will make their pattern repeat all the way around a complete revolution.

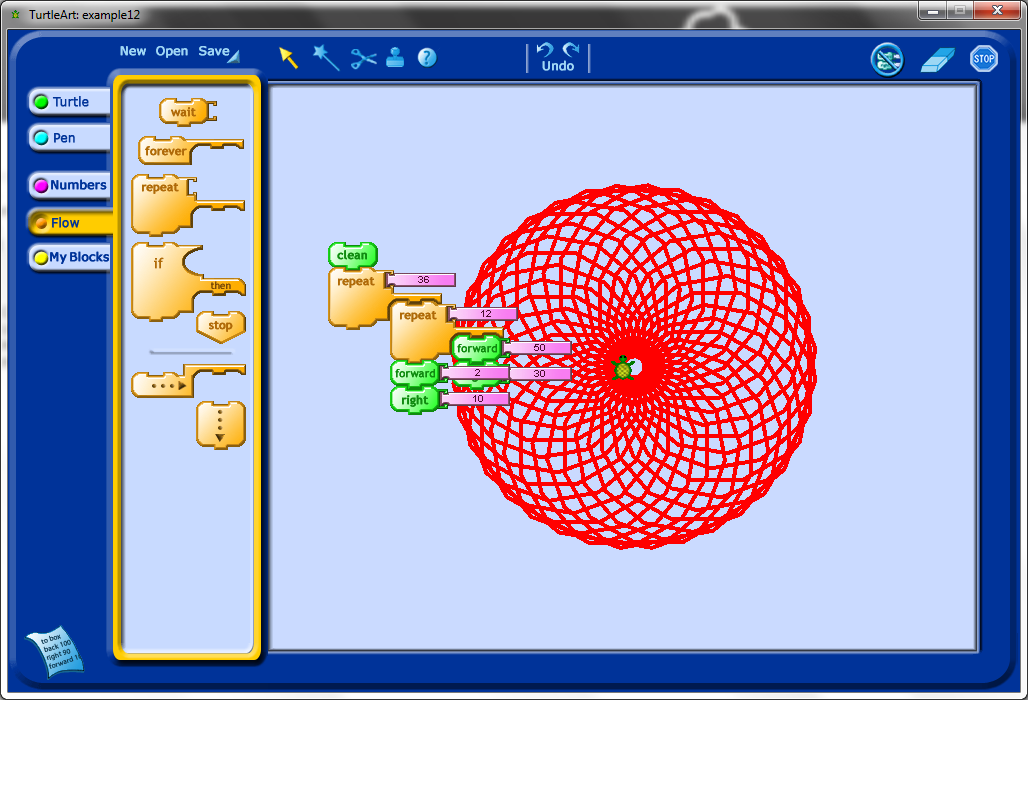
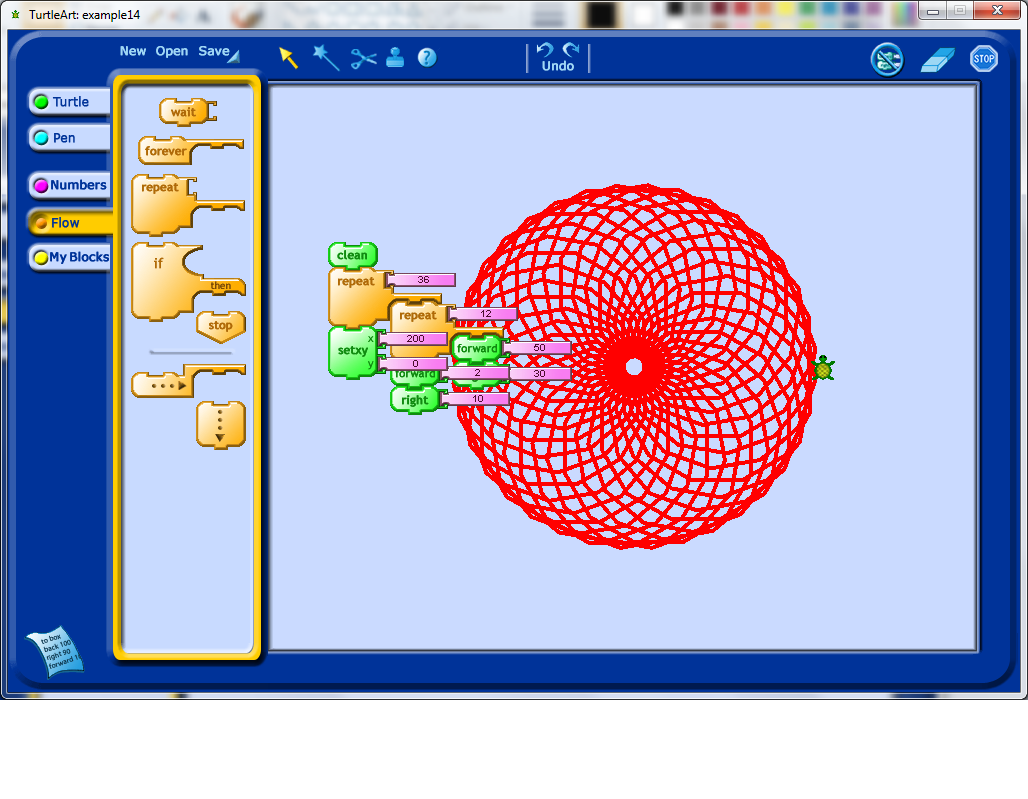
Now we really have an interesting looking shape. Notice that to get this shape, we repeated our outside loop exactly 36 times. Why 36 times, why not another number? What would happen if used a larger number?

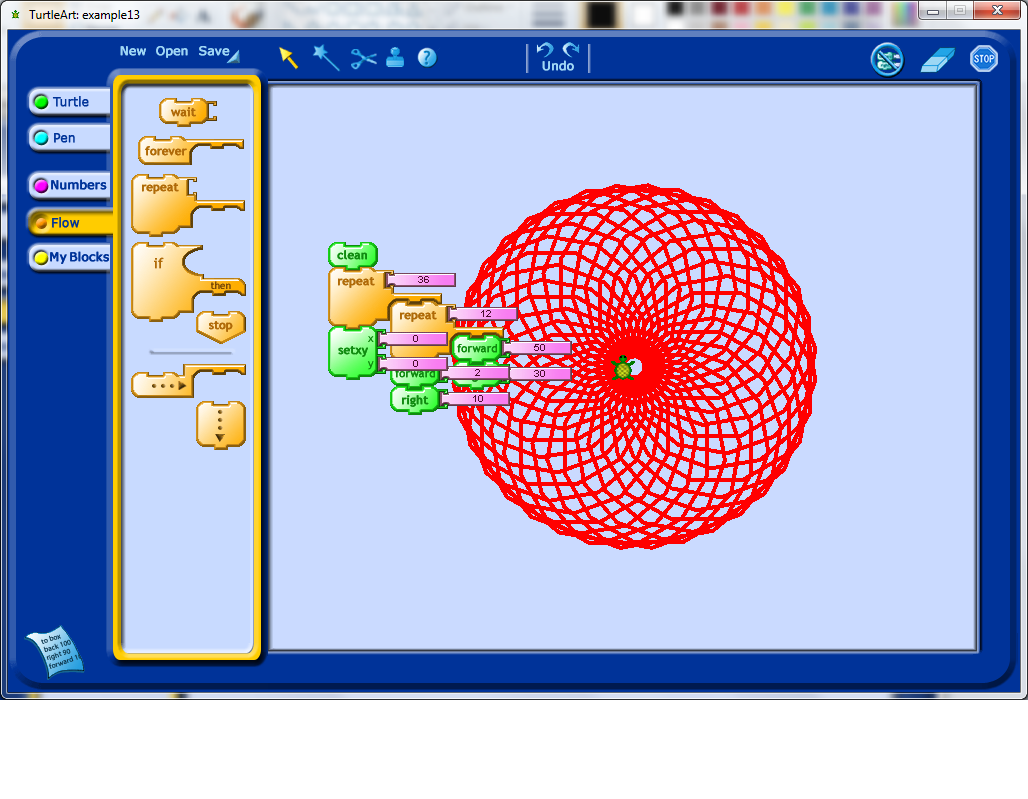
I found the Turtle icon sitting in the middle of the other picture to be a bit distracting, so I tried to use setxy (which, by the way, students absolutely find hysterical if you mispronounce it) to move it. Notice that this particular code block would lead to a discussion about Cartesian coordinates, and that through experimentation, especially if students have an understanding of negative numbers already, lead to understanding the purpose of a coordinate system.

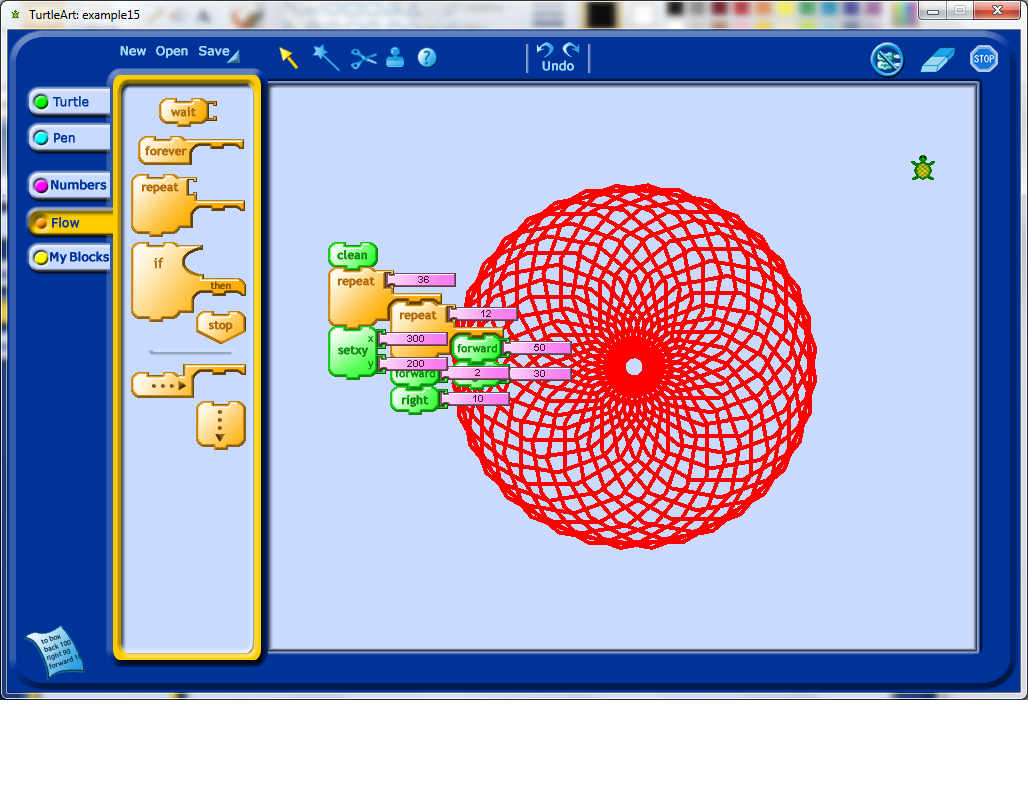
 I did some further exploration with the setxy tool, trying to get the Turtle icon off of my shape. Note that actually determining the actual size (in pixels) of this shape involves using trigonometry, so one could turn any exploration of shape into a mathematics problem session as well, simply by asking students to try and work out the sizes of the objects they create.

I finally got the Turtle off of the shape.

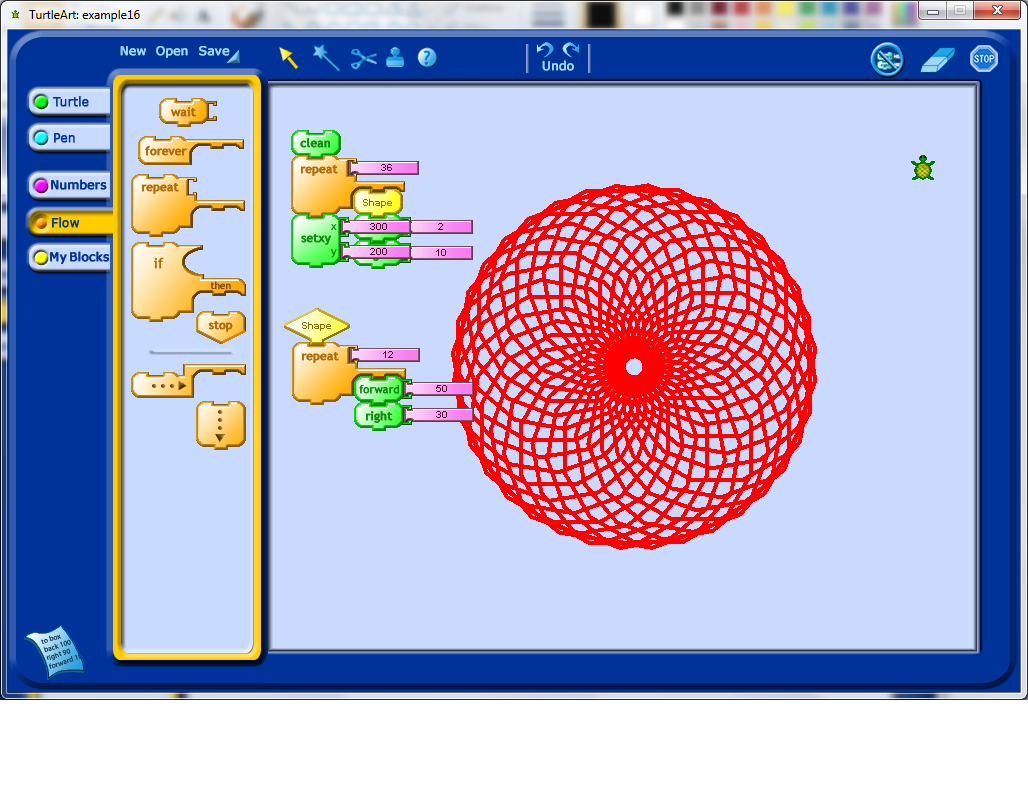
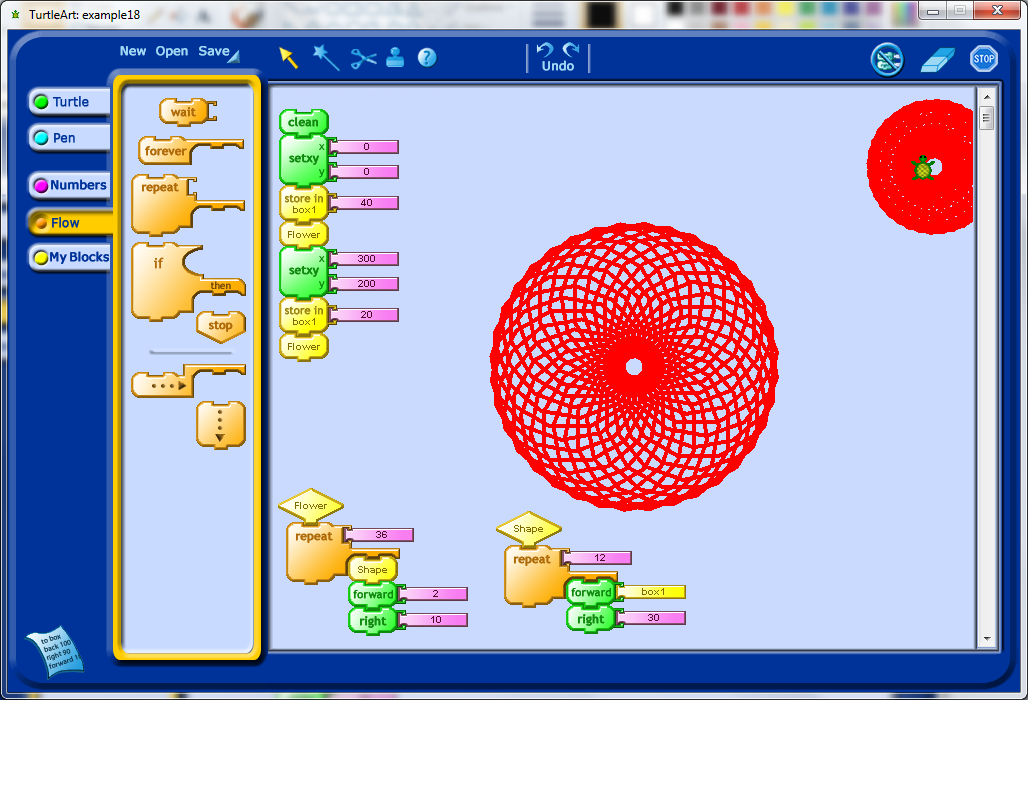
I decided that it would be nice to draw another one of these shapes in the new Turtle location, which meant I had to start changing my code to more easily allow for repetition of the code structures. Turtle Art allows for the person using it to define their own blocks. In this case, I decided to create a procedure called "Shape" which would be used to draw just the original 12 sides shape. I then called this procedure from the main block of code (see below).

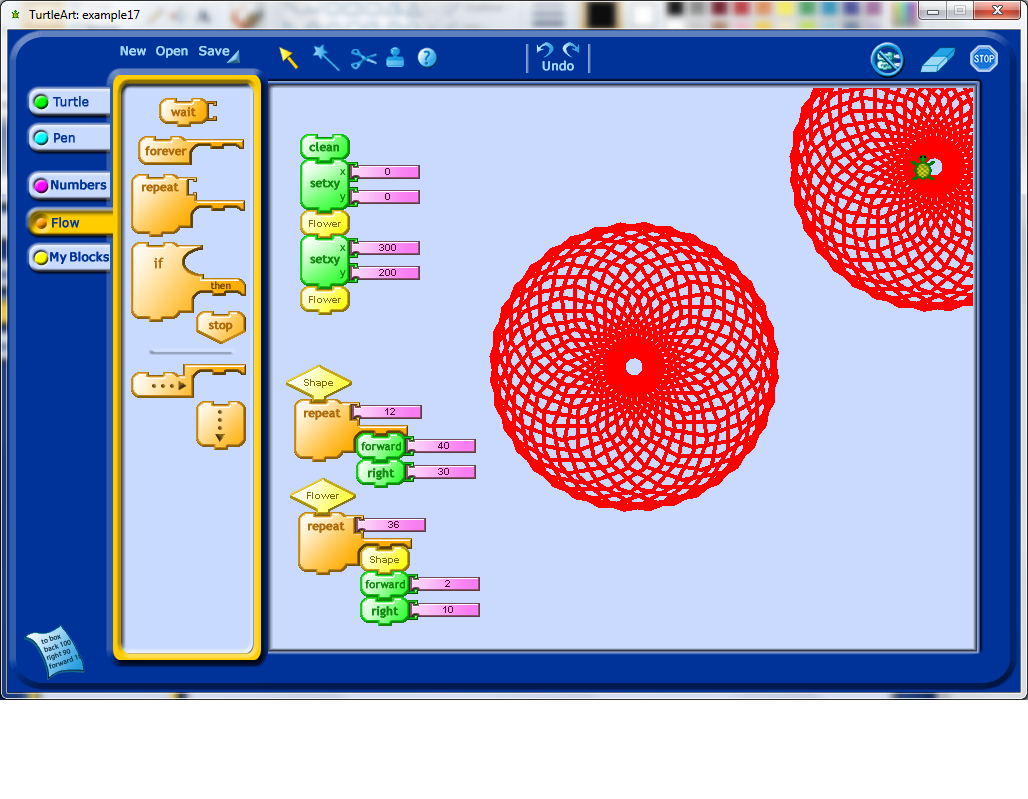
I then decided to make the put the rest of the code into it’s own block as well, which I called Flower. If you look below, you’ll see that I first clean the screen, move myself into the middle of the screen, draw the flower, move to the edge of the screen, and redraw the flower shape. It occurred to me that it would be nice to change the size of the flower if necessary. Doing this would require introducing a variable.

I created a variable, which got called box1 (I wonder if I can rename this somehow). I set the value of box1, and then call the Flower procedure, and inside the Shape procedure, the value of box1 is used to determine the amount of forward movement done by the Turtle icon while it draws the Flower shape. To draw a flower of a different size, I changed the value of box1 again, and then called the Flower procedure again.


You should see that even in a relatively simple example, there are a lot of embedded mathematical concepts. Through trial and error, careful observation, and a teacher’s mentorship, students should be able to develop some models of how these mathematical ideas work, within the Turtle Art environment. Besides learning mathematics, students will also have to develop other habits, such as patience, and the willingness to trouble-shoot and debug their programs.

Applying Math in Programming

The purpose of this post is to show an example of using math in the context of programming. I’ve written the post as I created the project, to try and outline my thinking during this process as much as I can. This is an example of me applying math that I know to a different context, creating a spiral of numbers. In a future post I plan on exploring what learning new mathematics through programming could look like.

Note: This post will look much better in the online version if you are reading it in an RSS reader or your email.

First, I start with a pretty basic HTML file with some an embedded JavaScript library called jQuery, and a blank Canvas HTML element.

[html5]


Prime Spiral


[/html5]

In the Javascript file, I start with the following:


// init()
$(document).ready(function () {

});

// debugging function
function debug(message) {
$(‘#debug’).append(message + ‘
‘);
}

So far all I have done is create two template files (which I always create when I am starting a new project written in JavaScript), and I have added the minimum skeleton to both of these files to get my project started.


// settings
var settings = {};
settings.numberOfNumbers = 200;

At the beginning of the JavaScript file, I add a settings variable. This will allow me later to tweak my project settings in one central location, rather than having to find where I have an embedded setting and modify it.

Next, I decided to resize the canvas so that regardless of what browser will view the canvas, it will be visible in their browser window.


// resize the canvas to the minimum of height and width for the screen
function resizeCanvas() {

// get the new width of the canvas, which should be the minimum of the height or width of the page
settings.dimension = $(window).height() > $(window).width() ? $(window).width() : $(window).height();

// now shrink it slightly
settings.dimension = settings.dimension * 0.90;

// now resize the canvas elements
$(‘#theContainer’).css({‘height’: settings.dimension, ‘width’: settings.dimension});
$(‘#theCanvas’).css({‘height’: settings.dimension, ‘width’: settings.dimension});

}

There are two pieces of mathematics here. One is a comparison between the height of the browser window and it’s width, and the other is shrinking of the region to 90% of the original dimensions. I could have used the built in minimum value function for the first part, but for some reason, I chose not to.

The next step is to actually write the numbers in a spiral. To do this, I decided to work in polar coordinates, because spirals are convenient to draw in that coordinate system, but unfortunately browsers operate in Cartesian coordinates. Each point in the browser window can be labelled with an x, y position, as measured from the bottom-left corner of the canvas. My objective is to start numbering the spiral from the center of the canvas, so I will have to translate each point, after having converted from polar coordinates to rectangular coordinates.

Here is the function for the conversion:


// convert from polar coordinates to offset cartesian coordinates
function convertFromPolarToCartesian(radius, theta) {

// A point at (radius, theta) can also be thought of as being
// at the end of the hypotenuse of a right-angled triangle,
// hence we can use trigonometry to find the Cartesian coordinates.
// Note: theta will need to be in radians to be useful here, since
// the Math.cos() and Math.sin() functions assume the angle is in radians.
var x = Math.cos(theta)*radius;
var y = Math.sin(theta)*radius;

// now shift the point into the center of the canvas
x = x + settings.dimensions/2;
y = y + settings.dimensions/2;

// return both points as an array
return new Array(x, y);
}

Now comes a moment of truth. I have not yet been able to test these most recent functions I have created, so they may have mistakes in them. I need to actually attempt to use these functions to find out if they return the expected values. My next step is to therefore try and produce a function which will create the spiral of numbers, using the functions I have so far as tools. First, I want to cycle through all of the numbers, which looks like this:


// draw the spiral of numbers
function drawNumbers() {

// cycle through each number from 1 to the maximum number of numbers given
for (var index = 1; index <= settings.numberOfNumbers; index++) { } }

This is essentially a sequence of numbers where I start with a value of 1, and I increase them (using index++), until I reach the maximum value as set globally in the script.

With each of these numbers, I am now going to want to calculate what it’s position would be, remembering that I’m going to work in polar coordinates. I want the radius of the position of the numbers to slowly increase in a linear way, from an initial value of zero, to a maximum value of just less than half of the maximum width of the canvas. Therefore when the number is 1, this should map to a radius of zero, and my maximum number should map to my maximum radius. Here’s my initial guess as to what this conversion should be:


radius = (index – 1) / settings.numberOfNumbers * (settings.dimension / 2) * 0.90;

For the angle, I just want it to increase at a constant rate for each number, remembering that I will be working in radians. An increase in angle of $\frac{1}{32}$ of a full rotation of a circle seems like a reasonable initial guess.


theta = (index – 1) * (1 / 32) * Math.PI;

Next, I used the function I created earlier to convert into Cartesian coordinates (with the shift), and finally I created a function which should actually display the numbers on the canvas. Here is what the full spiral function looks like at this stage:


// draw the spiral of numbers
function drawNumbers() {

// define the variables
var radius, theta, coordinates;

// cycle through each number from 1 to the maximum number of numbers given
for (var index = 1; index <= settings.numberOfNumbers; index++) { // set the radius so that it increases as the index increases, but is initially zero // note that we also want to scale the radius down slightly so that our spiral // is slightly smaller than the canvas radius = (index - 1) / settings.numberOfNumbers * (settings.dimension / 2) * 0.90; // our angle should increase at a constant rate, starting at 0 theta = (index - 1) * (1 / 32) * Math.PI; // now convert these into Cartesian coordinates coordinates = convertFromPolarToCartesian(radius, theta); // and then actually draw this number drawNumber(index, coordinates.x, coordinates.y); } }

Here’s the output of this function.
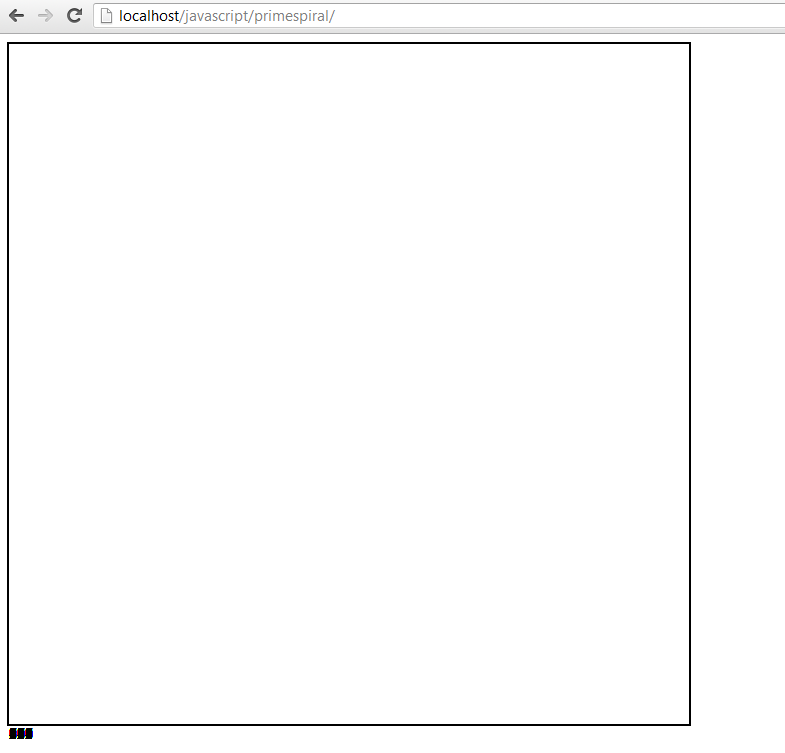
Ooops! Something went wrong. I scanned through my code, and luckily I spotted my mistake quickly. I had included an extra “s” in my polar coordinates to Cartesian coordinates conversion function. Here’s the updated output. This process of debugging a mistake can sometimes be quite frustrating, so it requires developing patience.
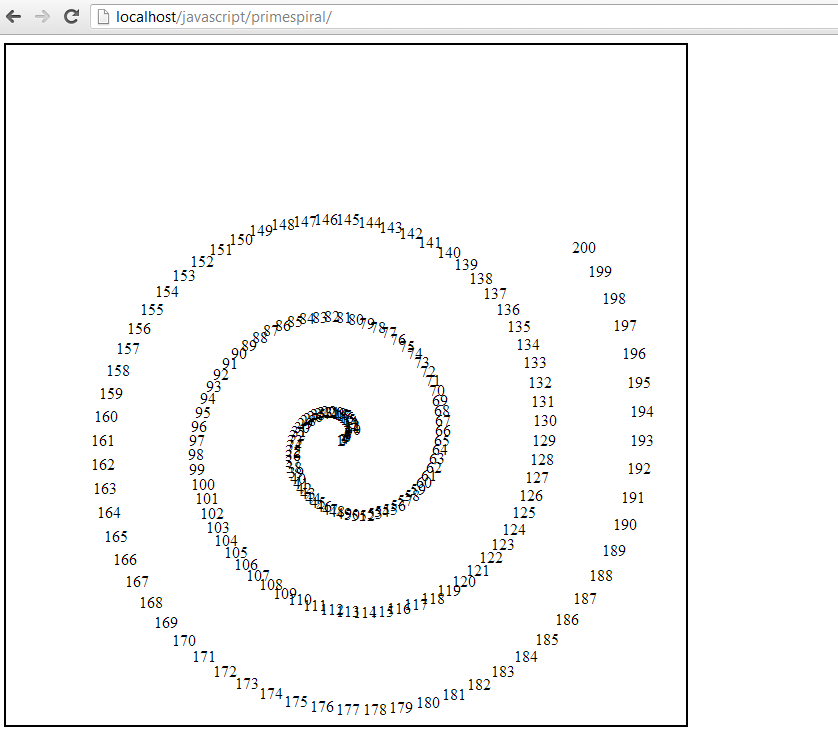
It is clear that my basic concept works at this stage. The numbers look very tightly jumbled at the beginning, which is probably because the angle rotation isn’t sufficient early on. My assumption that a linear increase in angle would work is probably wrong. Also, the spiral isn’t centred inside the canvas, suggesting that I will want to work on my conversion function.

I want the angles to start spread out more than they are, and then slowly increase over time. I tried some of the following, none of which produced the desired effect.


// tried varying the fraction increase of the angle
theta = (index – 1) * (1 / 16) * Math.PI;

// tried using a reciprocal function for the angle
theta = (index – 1) * (10 / index) * Math.PI;

// tried using a reciprocal square root function for the angle
theta = (index – 1) * (10 / Math.sqrt(index)) * Math.PI;

// trying a decay function on the angle
theta = (index – 1) * (Math.exp(-1*index/100)) * Math.PI;

I realized at this stage that what I wanted was not a constant increase in the angle, but a constant distance between the points, after their conversion into Cartesian coordinates. I decided to try and draw this out on paper to see if I could work out an algebraic relationship. I decided then to draw the following diagram to see if it would give me any insights on how to proceed:

When I looked at this, I realized that I could use the Cosine law to find the angle, given the new radius, old radius, and the gap between the letters. Initially, I tried a constant gap between the numbers, but after some playing around, I decided to gradually increase the font size between the numbers, and at the same time, gradually increase the gap between the letters. I ended up settling down on this as my final set of formulas for determining the position of the numbers.


// draw the spiral of numbers
function drawNumbers() {

// define the variables
var radius, radiusnew, rhs, theta, coordinates, fontSize;

// cycle through each number from 1 to the maximum number of numbers given
for (var index = 1; index <= primespiral.settings.numberOfNumbers; index++) { // set the radius so that it increases as the index increases, but is initially zero // note that we also want to scale the radius down slightly so that our spiral // is slightly smaller than the canvas radius = (index - 1) / primespiral.settings.numberOfNumbers * (primespiral.settings.dimension / 2) * 0.90 + 10; // keep track of the old radius radiusnew = (index) / primespiral.settings.numberOfNumbers * (primespiral.settings.dimension / 2) * 0.90 + 10; // fontsize should increase linearly as the index does fontSize = Math.round((index) / primespiral.settings.numberOfNumbers * 10 + 10); // calculate the rhs of the cosine law rhs = (radius*radius + radiusnew*radiusnew - (fontSize*1.5)*(fontSize*1.5))/(2*radius*radiusnew); // ensure that there is a minimum radius if (rhs < 0) { rhs = 0.1; } // our angle should increase such that the distance between the numbers is kept constant; theta = Math.acos(rhs); // now convert these into Cartesian coordinates coordinates = convertFromPolarToCartesian(radius, primespiral.currentAngle); // increment the next angle primespiral.currentAngle += theta; // and then actually draw this number drawNumber(index, coordinates.x, coordinates.y, fontSize); } }

How this works is that it calculates the current radius, the radius of where the next number will be placed, and then calculates the angle that corresponds to the gap between the letters, and then it saves all of this information for the next iteration of the loop by incrementing the current angle variable. I also worked on the portion of my script that converts the polar coordinates into Cartesian coordinates in an effort to better centre the spiral. This is my output with this code:
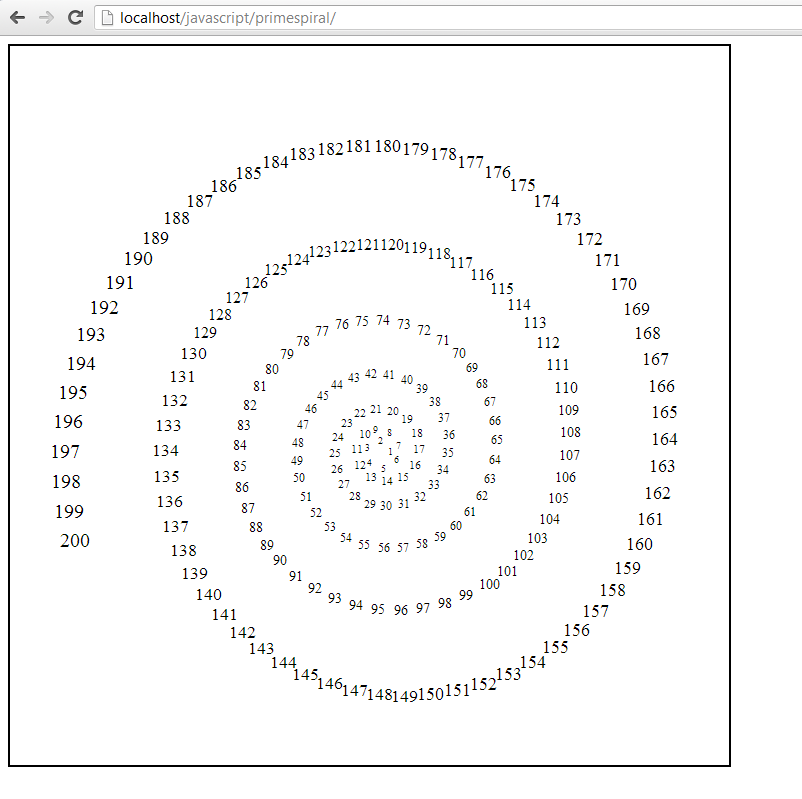
I decided, somewhat arbitrarily, that the next step is to identify which of the numbers are prime, and highlight them in some way to make them distinct. This means that I needed to write a function to determine if a given number is prime, and then pass along this information to the function that draws the numbers. Here was what I ended up with. Note that this function actually doesn’t work completely (except for “small” numbers) as noted in the comment at the end.


// identifies if a given number is prime or not
function isPrime(number) {
// naive algorithm
var primes = new Array(
2,3,5,7,11,13,17,19,23,29,
31,37,41,43,47,53,59,61,67,71,
73,79,83,89,97,101,103,107,109,113,
127,131,137,139,149,151,157,163,167,173,
179,181,191,193,197,199,211,223,227,229,
233,239,241,251,257,263,269,271,277,281,
283,293,307,311,313,317,331,337,347,349,
353,359,367,373,379,383,389,397,401,409,
419,421,431,433,439,443,449,457,461,463,
467,479,487,491,499,503,509,521,523,541,
547,557,563,569,571,577,587,593,599,601,
607,613,617,619,631,641,643,647,653,659,
661,673,677,683,691,701,709,719,727,733,
739,743,751,757,761,769,773,787,797,809,
811,821,823,827,829,839,853,857,859,863,
877,881,883,887,907,911,919,929,937,941,
947,953,967,971,977,983,991,997,1009,1013);

// check to see if the number is 1
if (number == 1) {
return false;
}

// first check to see if our potential prime is in the list
for (var i = 0; i < primes.length; i++) { if (primes[i] == number) { return true; } } // now check every prime smaller than n for (i = primes.length - 1; i > 0; i–) {
if (number % primes[i] == 0) {
return false;
}
}

// this isn’t actually guaranteed, unless n < 1013*1013 return true; }

Putting all of this together, and I end up with this. You can view the entire JavaScript file here.

What mathematics did I end up using? Do you think that this kind of application of mathematics would be a valuable one for students to experience?

Programming for kids

I was recently asked about some programming environments I’ve used with students, and I thought I might as well compile a list of them, as well as some environments I’ve considered using.

Younger students:

  • Blockly

    Blockly sample
    (Image credit: Blockly

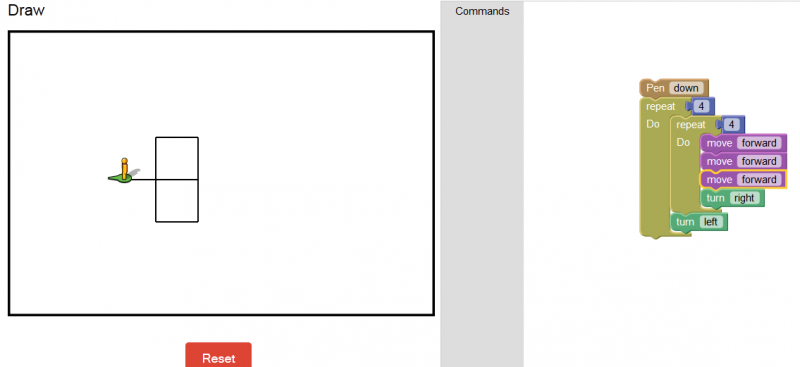
    Blockly is an open-source online programming environment developed by Google. It is currently very much a work in progress, although the language itself seems pretty stable, getting it to a state of usability for a group of students is not for the faint of heart. I mocked up a version of Blockly that resembles some aspects of the Logo programming language that I used with kindergarten students.


  • Turtle Art

    Turtle Art
    (Image credit: Sugar Labs)

    Turtle Art is a derivative programming environment of Logo, having been heavily influenced by the Logo programming language, and developed into a visual block version of it. It is multi-platform, and free to download (well sort of free – you need to email the developers of the program and request a download link for the program). I’ve used it with third and fourth grade students with some success. Turtle Art actually comes installed on the OLPC laptops.


  • StarLogo TNG


    StarLogo TNG is the extension of the original Logo programming into a 3d world. From their website, "StarLogo is a specialized version of the Logo programming language. With traditional versions of Logo, you can create drawings and animations by giving commands to graphic "turtles" on the computer screen. StarLogo extends this idea by allowing you to control thousands of graphic turtles in parallel. In addition, StarLogo makes the turtles’ world computationally active: you can write programs for thousands of "patches" that make up the turtles’ environment. Turtles and patches can interact with one another — for example, you can program the turtles to "sniff" around the world, and change their behaviors based on what they sense in the patches below. StarLogo is particularly well-suited for Artificial Life projects."


  • Hopskotch

    Hopskotch is an iPad, which is still in development, which allows children to do block programming in a very similar fashion to Scratch, Turtle Art, and other programming environments. I’ve not used Hopskotch myself to verify that it works.


  • Scratch

    Scratch
    (Image credit: Chris Betcher)

    Scratch is probably the most well known program for programming with kids. It has the same basic block structure that Turtle Art uses, but it has some additional features (ability to customize icons, object based programming) over and beyond the Turtle Art feature set. It can be quickly used to create simple animations, which is an attractive feature, but I found it harder to create simple geometric shapes than it is with Turtle Art.


  • Move the Turtle

    Move the Turtle Screen shot
    (Image credit: Move the Turtle)

    Move the Turtle is an iPhone/iPad app. It has a feature set very similar to Turtle Art (although somewhat reduced programming functionality). One thing that is compelling about it is that it includes a series of tutorials through puzzles which means that students without the support of a teacher can play around with the puzzles and learn how the application works. Obviously there is a certain amount of playing around necessary with any programming environment in order to learn it, but the tutorials Move the Turtle provides are useful when students get completely stuck.


  • CoffeeMUD 

    Coffee Mud screenshot
    (Image credit: Coffee MUD screenshot)

    Coffee MUD is easily the most difficult of all of the programming environments listed here to set up, and certainly amongst the most complicated environments to use. Coffee MUD is an online multi-user dungeon environment which means that it is both a somewhat collaborative game that students can play (and build their literacy skills in) and create.

    How Coffee MUD works is that it provides a server to which each student connects using some client software (recommendation: Jaba Mud client). While playing Coffee MUD, students navigate through a text based world, moving from room to room, and interacting with objects and non-player characters (NPCs) within the game. Many MUDs have no combat at all and have users interact with each other (social role-playing) or with the digital world provided via quests that the users solve.

    It also provides a way to interface (through a web browser) to the code that runs Coffee MUD and let trusted users add rooms, objects, and NPCs, as well as add a specialized coding system to allow players to interact and change these objects, rooms, and NPCs during the normal course of play.

    One enormous advantage I see with Coffee MUD is that the system is flexible and stable enough to potentially allow an entire school to interact via text in a virtual Coffee MUD world. While obviously this interaction shouldn’t come at the expense of face to face time, it could replace the traditional book report (create a virtual version of the story of the book instead!) or some creative writing time. For example, it would be an interesting interaction of the 7th graders attempt to create a portion of the game that the 3rd graders then play in.
     

Older students:

  • Alice

    Alice logo
    (Image credit: Alice 3 logo)

    I’ve not used Alice myself (except in a rudimentary way to test it out a bit), but I have heard some good things about it. One strength is that it relies on building object based programming with students, which is much more powerful and flexible than more traditional procedural based programming. From the Alice website:

    "Using an innovative 3D programming environment that makes it easy to create animations or games, the Alice Project seeks to provide tools and materials for a conceptual core of computational thinking, problem solving, and computer programming.

    The Alice Suite of educational tools is designed to support teaching and learning across a spectrum of ages, grade levels, and classes in K-12 and in college or university courses."


  • Python

    Python is both a command line programming language, and a language that can be used to build web applications. Many of the web applications created by Google are powered by Python. It’s not an especially new programming language, but the benefit of this is that there are an awful lot of great resources out there to learn how to program in it. See, for example, this excellent online tutorial.


  • Visual Python

    From the website for Visual Python (which I have successfully installed and played with myself): "VPython is the Python programming language plus a 3D graphics module called "visual" originated by David Scherer in 2000. VPython makes it easy to create navigable 3D displays and animations, even for those with limited programming experience. Because it is based on Python, it also has much to offer for experienced programmers and researchers."


  • JavaScript

    JavaScript is actually a pretty difficult language to learn because it requires an understanding of HTML and CSS first. It is probably best learned as a companion piece to making HTML websites more interactive. It also happens to be the base language for the scripting language Google uses for their Google Apps scripting environment, which means that students could potentially learn some JavaScript through programming directly in their browser. Students who want to learn JavaScript will also want to learn HTML, a mark-up language that JavaScript is often used to give dynamic capabilities.
     

  • See also:

Logo(ish) programming in the browser

Blockly example


I found out through Reddit about a new visual programming language that runs in the browser called Blockly. The system looked pretty good, but wasn’t quite right for my students. Fortunately the Blockly code was fairly easy to figure out, and so I hacked around a bit this weekend, and put together a simplified version of the system for use with my kindergarten students tomorrow. This version allows students to use code to create simple animations. Unfortunately, at this stage the animations cannot be saved.

You can check it out here.

  • It does not run in Internet Explorer. It may not run in a few other browsers as well. I can confirm that it should work in Google Chrome and Firefox, and it probably works in Safari.
  • It’s not done yet. I plan on adding more of the advanced functionality, which exists already in the Blockly language, and should be easily implemented.
  • I plan on beefing up the forward and turn commands so they are similar in power to what can be done in Logo. One of the chief advantages of Logo is that it is both an easy to understand language, and powerful.
  • I plan on implementing save and share features if this system looks reasonably useful.
  • I think the graphics for the turn and forward code blocks could be better. For example, they should show an arrow either turning, or going straight.


Do you have any feedback about how I could improve this programming environment? 


Disease simulation

Yesterday, our learning specialist for science, Ana, read an article about how games are used to help simulate the spread of disease. She suggested that we could turn this into a collaboration between biology and math, and create a game so that students learn some of the principles of the spread of disease (which is a biology topic) from a mathematical perspective.

I created a simulation so we could test what parameters we may want to use in the classroom so that students are most likely to see that the spread of a disease can be modelled effectivelyh, and see the probability of the infection being spread from person doesn’t change the type of mathematical infection curve much. Try the simulation here.

Some assumptions I’ve made with this simulation:

  • Individuals once infected, stay infected.
  • Each individual has an equal probability of being infected by anyone else in the population.
  • The probability of anyone being infected remains constant over time.
  • Individuals can be re-infected.

I don’t know if we will end up using this simulation with students, but if we do, I’d like it to be fairly clear  so they can get started using the simulation without much intervention from me.

Automaticity in programming and math

I’ve been learning how to program for a long time, a task that has much in common with mathematics. Both programming and mathematics involve being able to solve problems. Some of the problems in programming and mathematics have well established solutions and other problems do not. On a micro-level, programming involves manipulating code, a task much like the symbolic manipulation often used in mathematics. On a macro-level, programmers and mathematicians both need to be able to trouble-shoot, organize, and communicate their solutions.

Sample code:

Sample code

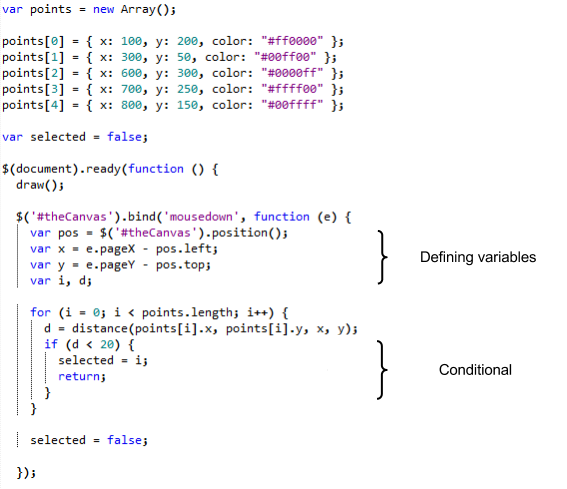
When I learned how to program, I taught myself, and I know that as a result, the code I create does not always follow the most appropriate industry standards. I have some unconventional solutions to some of the standard problems in programming, and I have less than optimal solutions for some basic problems in programming. I’ve yet to develop my own library of solutions, a standard practice in the industry.

On the other hand, I’m not a professional programmer. I program to solve problems I run into in life, and I program for fun. I have many programming projects that I’ve started and not completed. I’m an amateur programmer. I don’t need my work to look exactly what professional programmers’ work looks like because I rarely, if ever, share my programming with other people. I often share the results of my programming though, and this has helped build some useful tools for my students.

There are many low-level tasks that I no longer need to reference. I don’t need to look up how to define variables or functions, and I don’t need to look up loops, conditionals, and other basic parts of the structure of the programming languages that I know. I still need to look up the methods and properties of some higher level objects in the programming languages I know though, and when I program in PHP, I have a reference manual for the hundreds of functions available in PHP always open. I could be said to have developed a certain amount of automaticity in learning how to program, especially for the more basic tasks.

This automaticity was not learned by memorizing programming structures. I didn’t develop automaticity by doing practice exercises. I didn’t develop automaticity by reading books on programming. I developed automaticity in the low-level programming tasks by programming, by giving myself projects to work on that required me to build my skill, and by repeatedly looking up reference material when I got stuck. I developed automaticity because it is frustrating to write code that doesn’t work. It’s frustrating to get error messages that are nearly incomprehensible back from the computer when you make a mistake in the structure of your code.

If we look at mathematics education, we see that many, many of the problems given to students which have standard solutions. We expect students to develop fluency in these problems, often before they ever get to see any of the non-standard problems. In fact, in k to 12 education, students can potentially never be given an open-ended non-standard problem. Unfortunately, I believe this approach has failed our students in the past, and I’m not alone.

I’d like to see a system without a focus on fluency and automaticity in mathematics. These are the wrong drivers of mathematics education. Instead of focusing on the lowest level tasks mathematicians do, and assuming that fluency in these tasks leads to mathematical reasoning, we should focus on the most interesting and challenging tasks, and expect that a certain degree of fluency and automaticity will be developed as a result of these tasks. Instead of expecting students to memorize recipes and algorithms, we should allow them to develop toolkits and libraries to use of their own that they can reference as needed. Instead of feeling that every problem students need to do has to be solved quickly or efficiently, we should allow for alternate solutions and methods to be used.

Thinking about my first experience with technology

I am currently working on my Masters degree in Educational Technology and as part of my current course we are to create an e-folio for keeping track of our observation. 

Wang PC 240One of our first assignments was to reflect upon an early experience in our lives when we were exposed to or used technology, and discuss how and why we remember the experience.  Most people talked about early computer games or their earliest computers, I chose to talk about my first computer, a hand-me-down Wang.

My father gave me this computer when he bought his new computer, which if I recall correctly was an IBM portable computer.  The cool thing about it was that it came with a BASIC programming interface and an interpreter, so it was also the first computer that I did any programming on.  I had a reference book on BASIC my father had bought, and so I could look up functions and programming structures.  My dad was programming in BASIC at the time as well, so I’m sure I asked him for help once in a while.

What I loved about programming was the ability to make the computer do things (which is still what I love) like manipulating text, graphing graphics from text characters, etc…  I seem to remember constructing fun shapes using ASCII characters like Ascii 200 and Ascii 204.  You could create mazes, etc… and if I recall correctly there was very little space (or no space) between the characters so that the mazes looked seemless.

Over the years I worked on many mini-projects, my favourite being a computer game which I used as my science fair project in 10th grade (I got a C+, apparently you need to do a write-up even if what you’ve done is really cool).  I also remember programming a simplistic word processor, which included a simple word wrap algorithm and the ability to load and save files.  Think Notepad for DOS.

When I went to university, for some reason I set computers aside as a thing to be used as a tool, and used them more for recreation.  Had I paid more attention to them in school, I might have been able to start in this WWW craze much sooner.  Who knows what would have happened?

Anyway this early experience has definitely led me along a life-long path as an early adopter of technology and has helped me become an avid web design enthusiast.  My most recent project, creating desktop applications with Adobe AIR has been quite interesting, and I’m sure I’m not done now.